Version 2.4.0 & 2.4.1 - 12/16/2021
# Version 2.4.0 & 2.4.1 - 12/16/2021
In this release we have done a major overhaul of how LocalStack works within the Commandeer ecosystem. We have decoupled your running instances of LocalStack from the Commandeer accounts a bit to make it easier to see your instances without having to switch accounts.
# LocalStack Dashboard
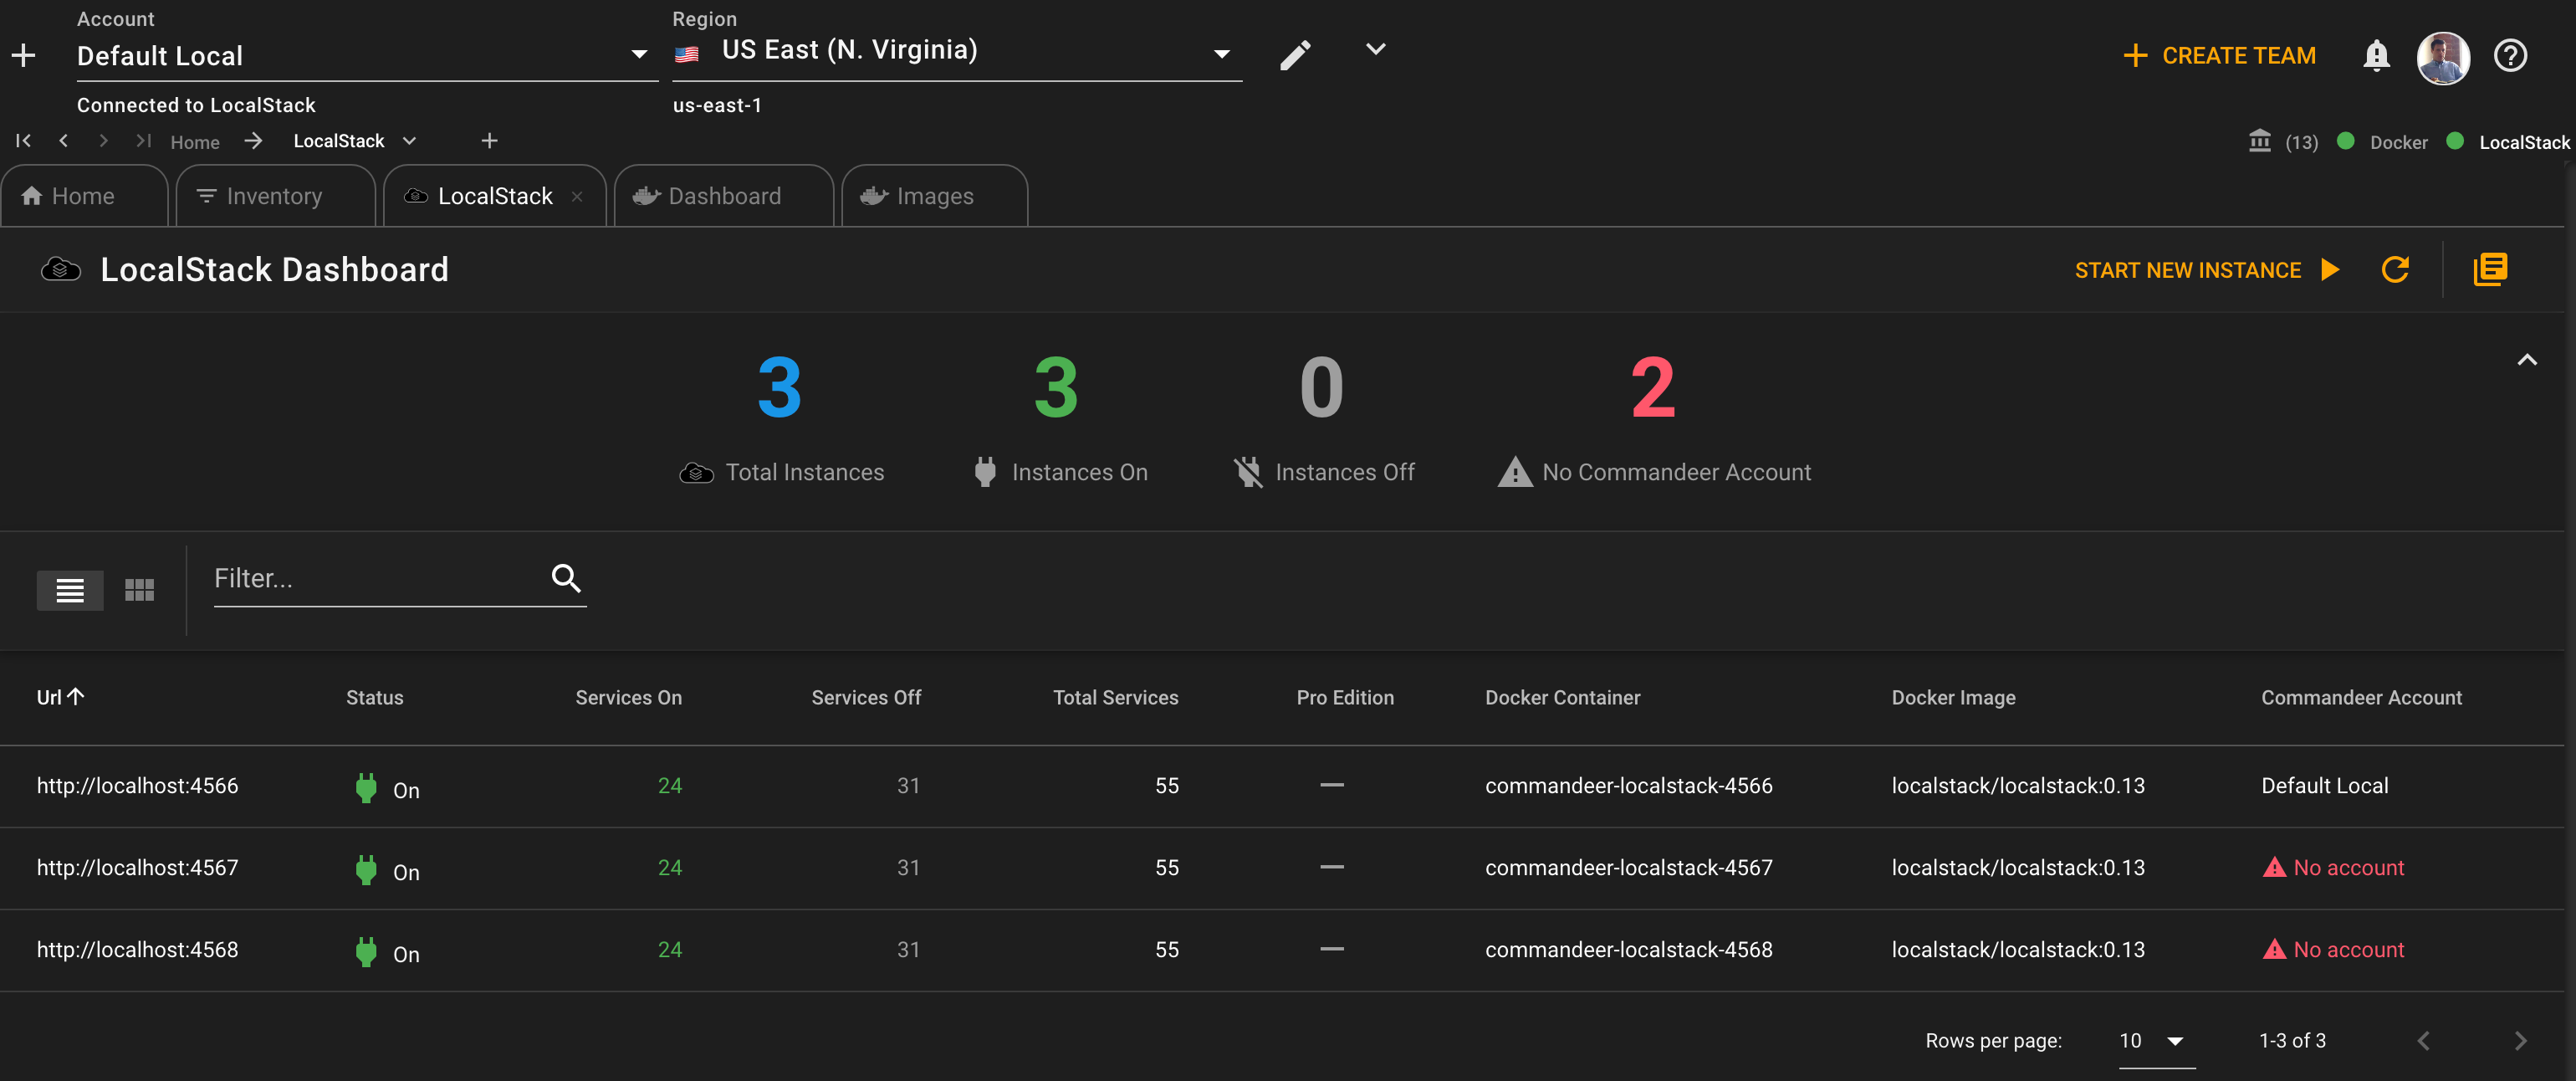
There is now a new page in the LocalStack section that shows you every instance you have running in Docker containers on your local computer. Previously, you could have multiple instances running on your computer with different ports, and it worked just fine. But you could only switch to them by switching the account you are connected to at the top of the app. Now you can see all your instances, and start instances up easier than ever. Below you can see that there are 3 instances of LocalStack running in docker on my computer. Also note that it will show you if the container is connected to a Commandeer account. This means that you can view things like S3, DynamoDB, SQS etc. from within Commandeer.
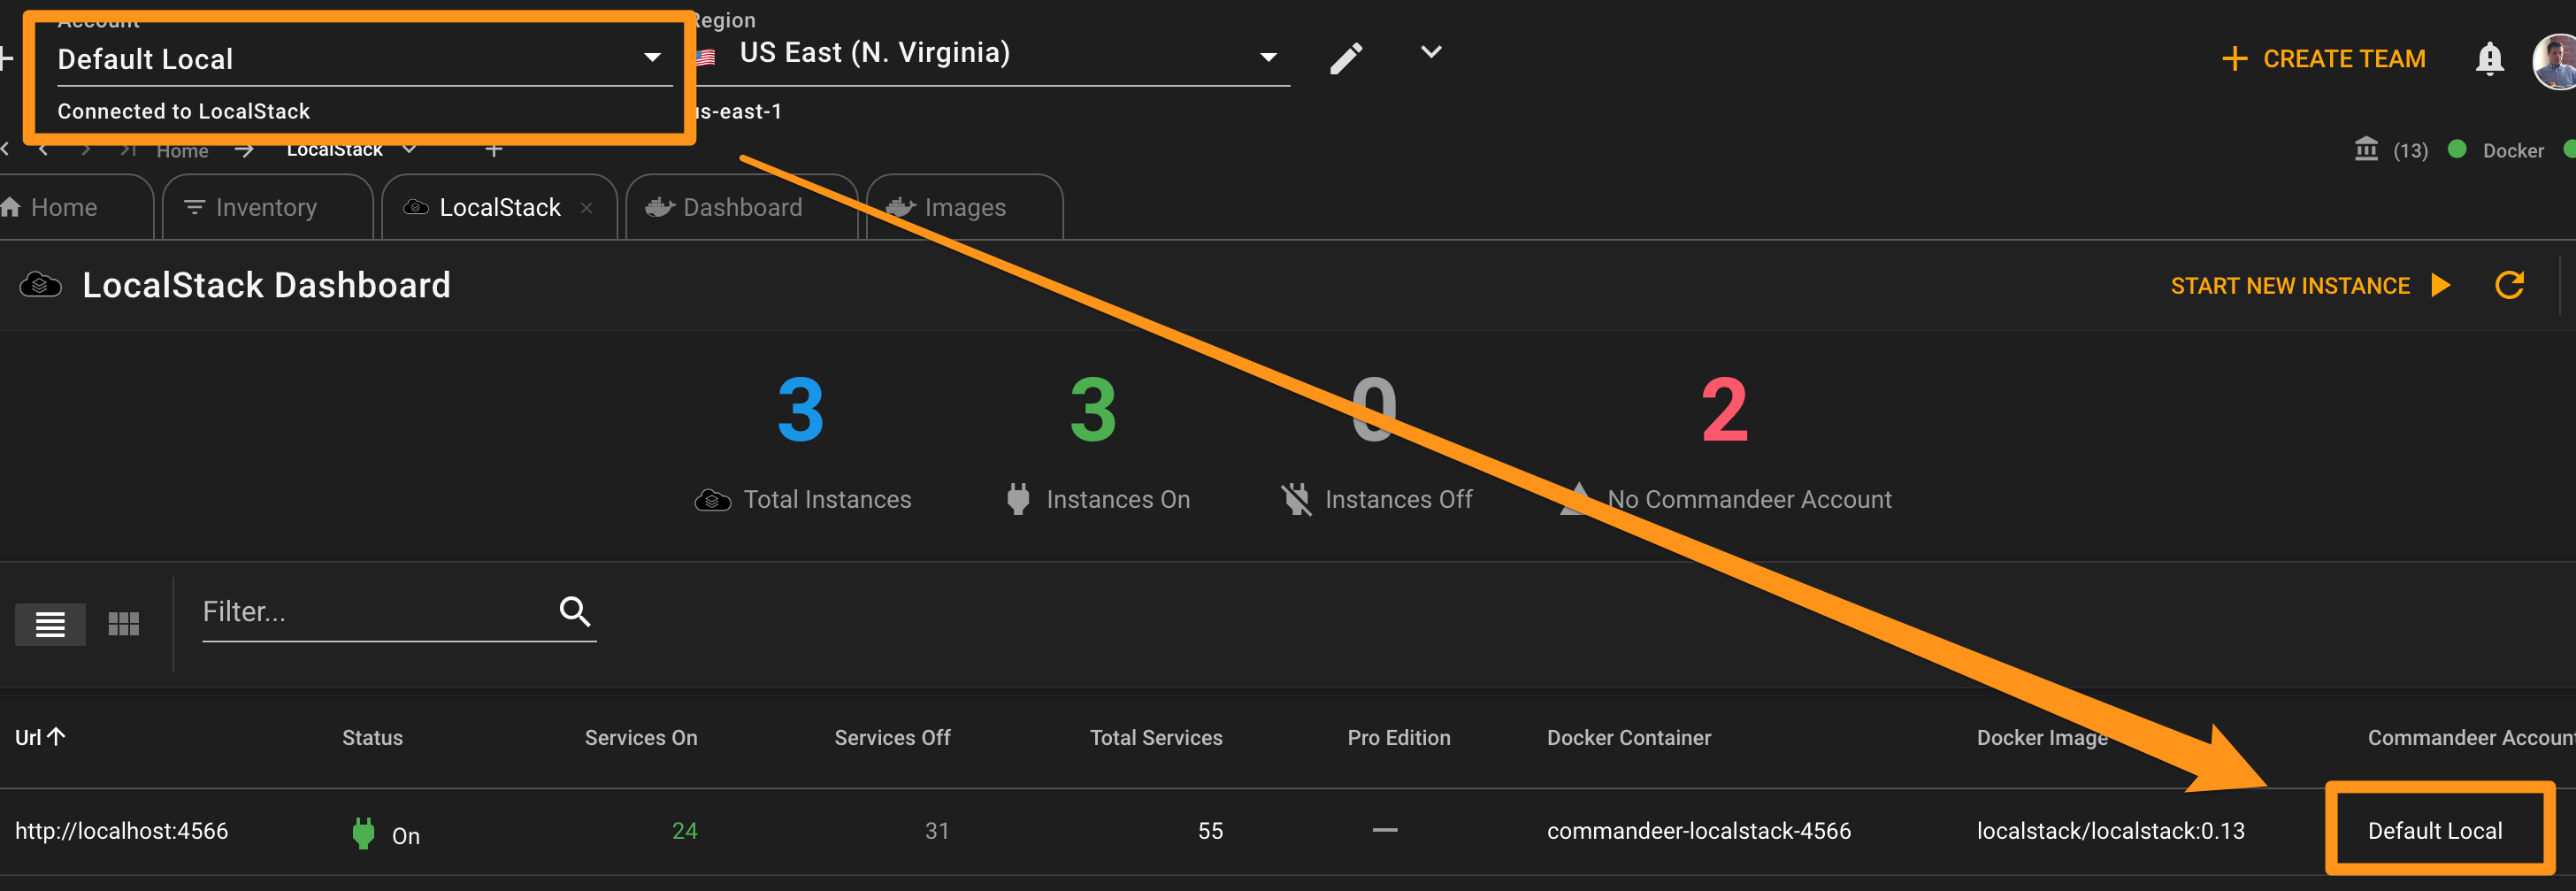
Below you can see that the LocalStack instance running on port 4566 is connected to the Default Local account in Commandeer.
# Connect LocalStack Instance to a Commandeer Account
To connect another account to let's say the 4567 instance, simply click the top left + icon and select, 'Create account...' from the dropdown menu.

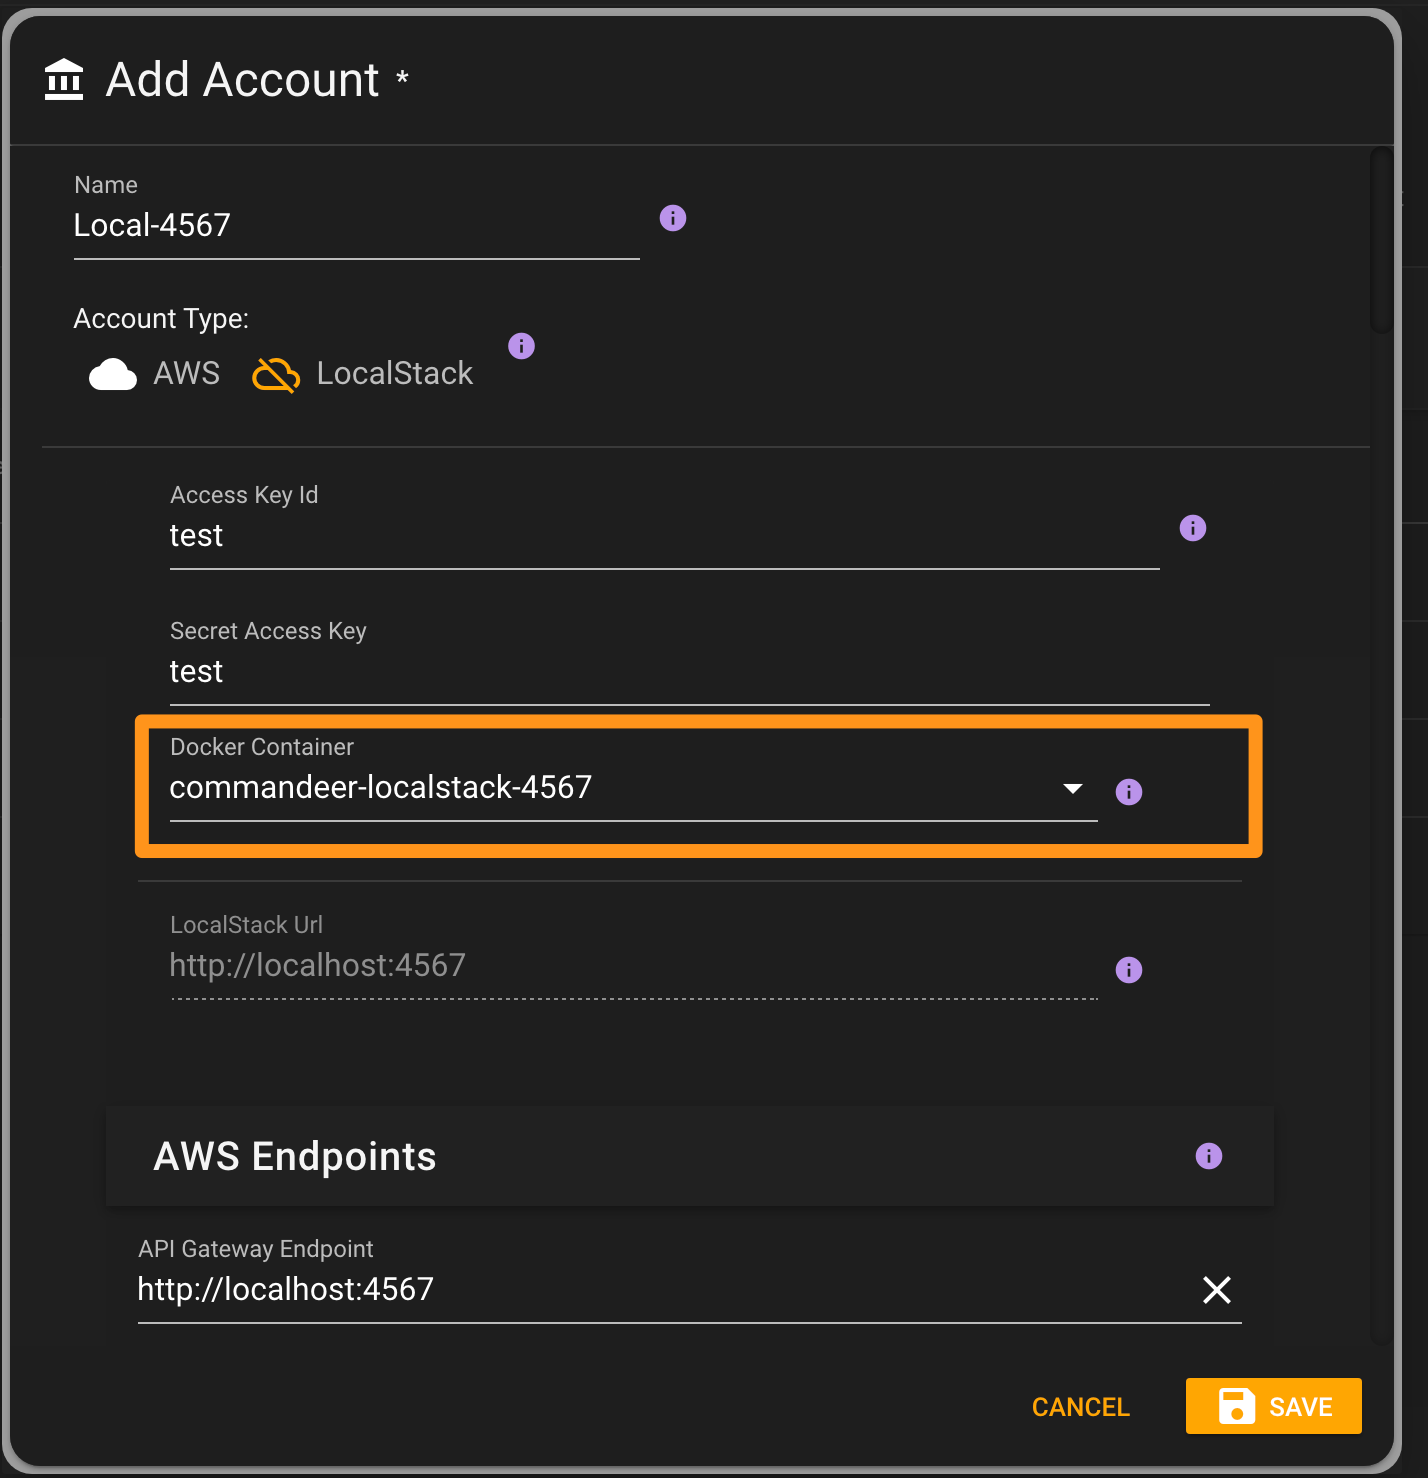
The Create account dialog is simplified a bit now for LocalStack in that you are only able to select a running instance rather than start a new instance. Below you can see the dialog, where you can select the container that is attached to the account.
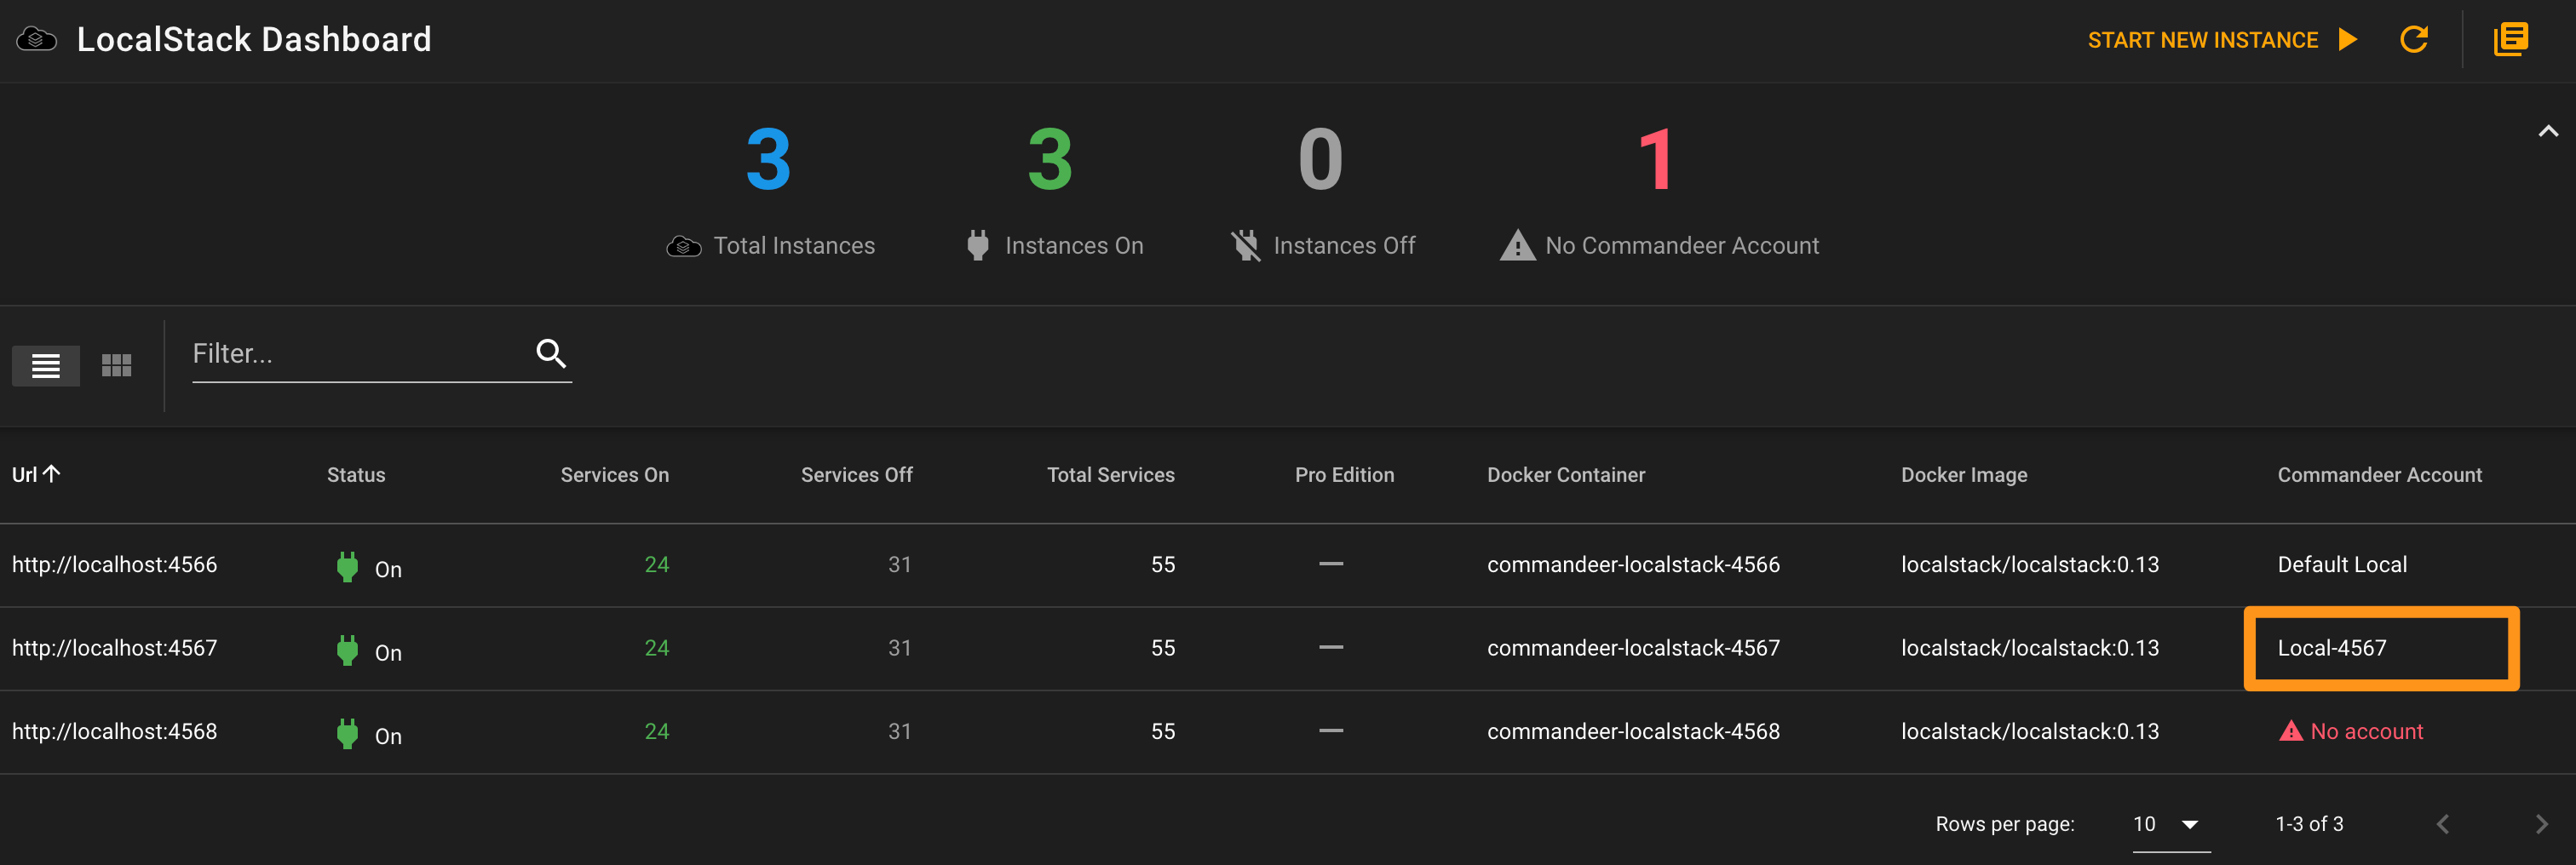
Once you click save, you will see that the instance within the LocalStack dashboard now shows that there is a connected account.
Once this is setup, you can then easily switch between accounts in the top of the app, and you will see resources for that particular instance. For example, you could run a dev and staging version of your system on LocalStack, and each one could have it's own set of S3 Buckets, or DynamoDB tables, and the accompanying data.
# Starting a new instance of LocalStack
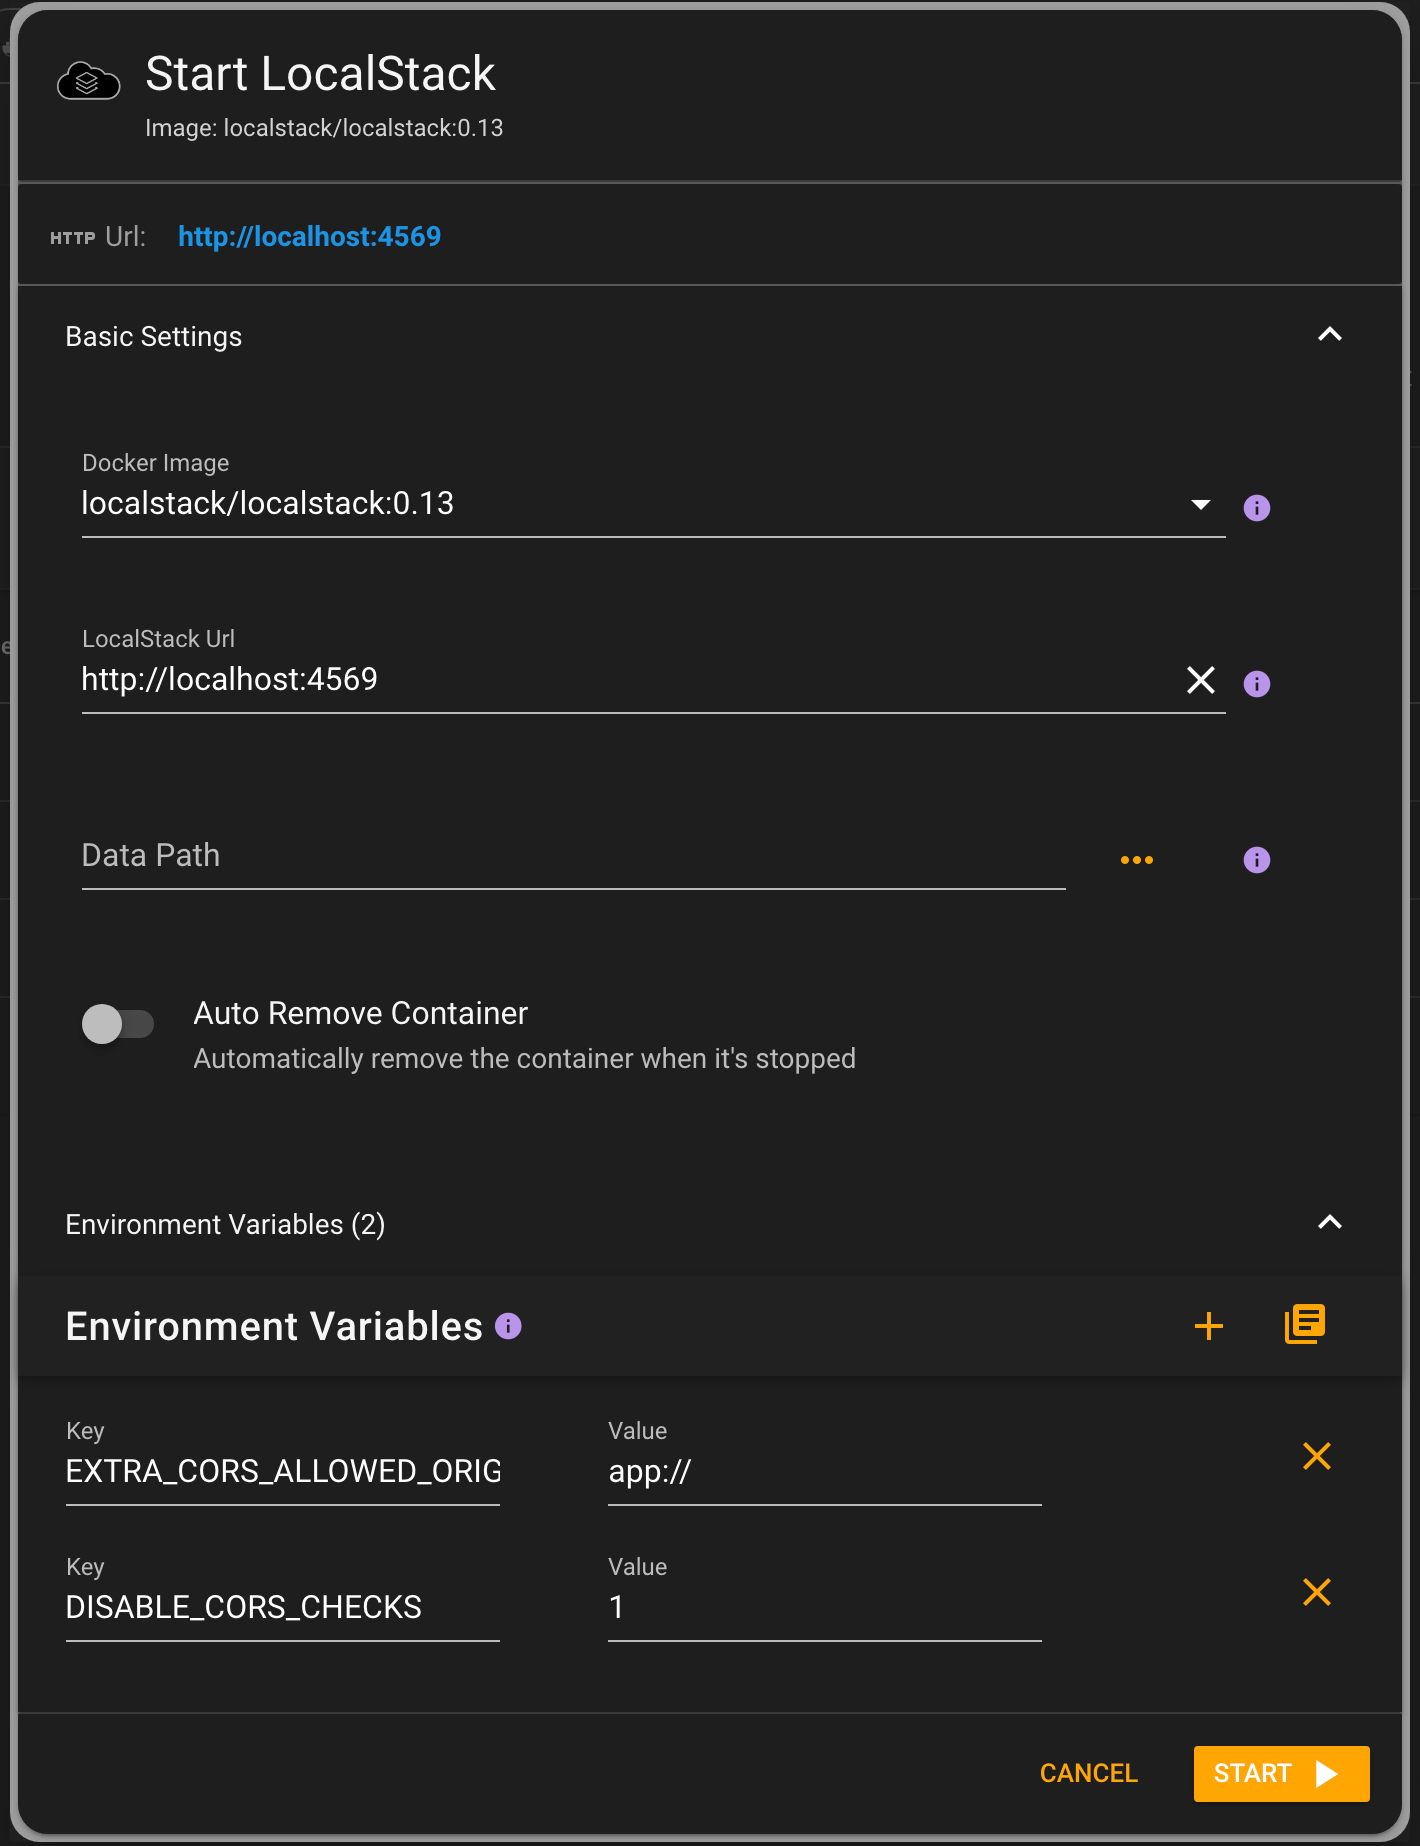
To start a new instance of LocalStack running on a new port, you can simply press the 'Start New Instance' button on the LocalStack dashboard. This will bring up a dialog that allows you to select the image to use, the url, and set any environment variables you want. Below you can see the button on the dashboard.

Pressing it brings up the Start new Instance dialog.
# Onboarding Experience
If you are new to Commandeer, you will be presented with a 3 step onboarding experience to setup your first account on Commandeer. This will allow you to either connect to an already running instance of LocalStack or add your credentials to connect to your AWS account. After this initial account, you can always create more accounts to connect to multiple LocalStack instances, or the same AWS accounts but in different regions, or to multiple AWS accounts. This makes switching between your different systems trivial.
# Conclusion
By working to further refine the experience of using LocalStack from within Commandeer, we hope you find it much easier to manage your system. Stay tuned over the next couple months as we begin to add support for more services including Kinesis, ElastiCache, ElastiSearch, Kafka, and many more.
Happy developing!
