Running LocalStack on AWS Lightsail
# Running LocalStack on AWS Lightsail
For those unfamiliar with LocalStack, it is a local mock version of AWS. It allows you to access AWS services such as DynamoDB, S3, Lambda and more, but all running within a Docker container on your local machine. But what if you wanted to develop in the cloud and not have to incur the costs of AWS for your devs. Well, one way is to host LocalStack on LightSail.
AWS LightSail allows you to create virtual machines in the cloud. The really nice part is that you can instantly get a public IP address, so accessing your system is a breeze.
# Prerequisites
This article assumes some knowledge of the different technologies below although not essential.
AWS Lightsail: A way to build applications and websites fast with low-cost, pre-configured cloud resources. We will use this to host a Docker container with LocalStack.
Docker: A software platform that allows you to build, test, and deploy applications quickly. This will be used to run the LocalStack application.
LocalStack: A mock version of AWS that allows you to access it the same way that you would AWS services via the AWS CLI or AWS SDK's.
Commandeer: A desktop app that allows you to manage LocalStack and AWS in the same way. You can instantly switch between different accounts and regions. It is the best way to connect and view many of the most popular services available on AWS.
# 1. Setup LightSail
Create an AWS Account
Go to AWS Console and create an account if you do not already have one. For new users, Amazon provides a free tier where you can create some resources for free without paying anything for the first year of usage.
Create an AWS Lightsail instance
Once your account is ready, head over to Amazon Lightsail.
- On the Lightsail page, create a new instance by clicking the Create Instance button.
Choose the instance location closest to you. - Pick your instance image.
- Select platform Linux/Unix;
- Select a blueprint Ubuntu 20.04 LTS;
- Create an SSH key if you do not already have one;
- Choose your instance plan.
- To get started select your instance. lt is recommend to use the
2gb Ram, 1vCPU, 60gb SSDinstance.
- To get started select your instance. lt is recommend to use the
- Identify your instance.
- Give your resource a unique name.
- Now create an instance.
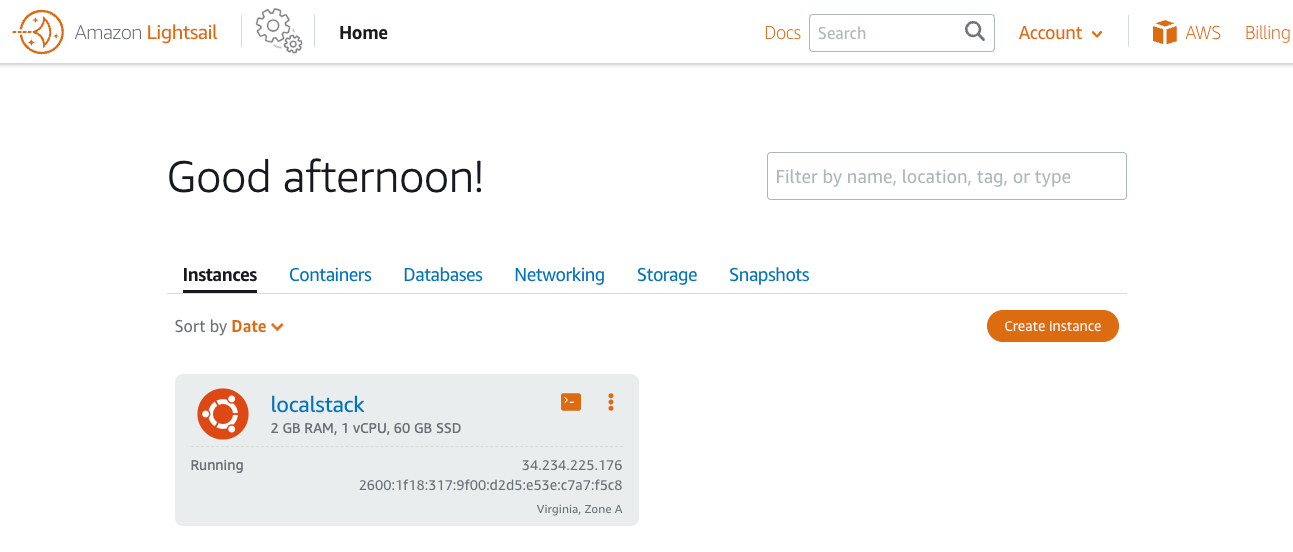
- When you create your instance take note of the Public IP that is attached to your instance. You will need this to check your installation of LocalStack at the end of the installation. You can get this IP following the steps outlined in the article IP addresses in Amazon Lightsail.
# 2. Install Docker
- Connect to your instance via SSH by pressing the little console button on the instance above.
- Check if the system is up-to-date using the following command:
sudo apt-get update
- Install Docker using the following command:
sudo apt install docker.io
You’ll then get a prompt asking you to choose between y/n - choose **_y_**
- Install all the dependency packages using the following command:
sudo snap install docker
- Before installing LocalStack, check the version installed using the following command:
sudo docker --version

# 3. Start LocalStack
Now to install Localstack. This is super simple. You can just run a single command.
sudo docker run --rm -it -p 80:4566 -p 4510-4559:4510-4559 --name localstack localstack/localstack
Notice that we are proxying port 80 to 4566. This enables LocalStack to be accessible via the web.
We can verify that your LocalStack is running by hitting the health endpoint. Just grab the Public IP address for the LightSail instance and add /health to the end of it. In this example, our IP address was 34.234.225.176.
curl http://34.234.225.176/health

Now that it is up and running, let's head over to Commandeer and start testing.
# 4. Verify in Commandeeer
Commandeer is a desktop tool to manage AWS and LocalStack. You can download it at https://getcommandeer.com. There is a 7 day free trial if you want to just kick the tires on it.
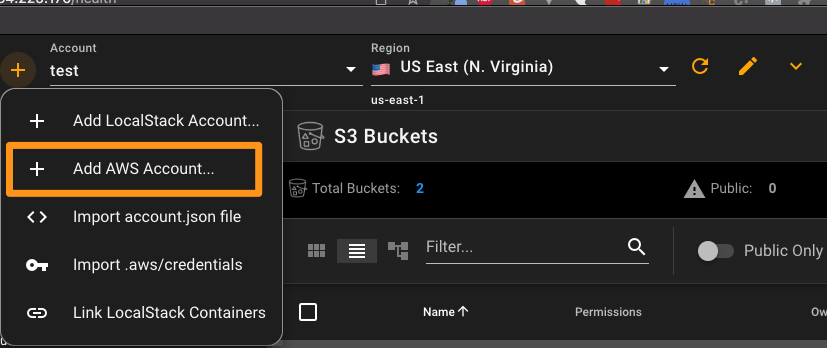
In the top left of the app, click the + button and then select Add AWS Account... You will notice that we are selecting that rather than the Add LocalStack Account... option. This is because we will not be running a local version in Docker, but instead will need to set the endpoints for each service.
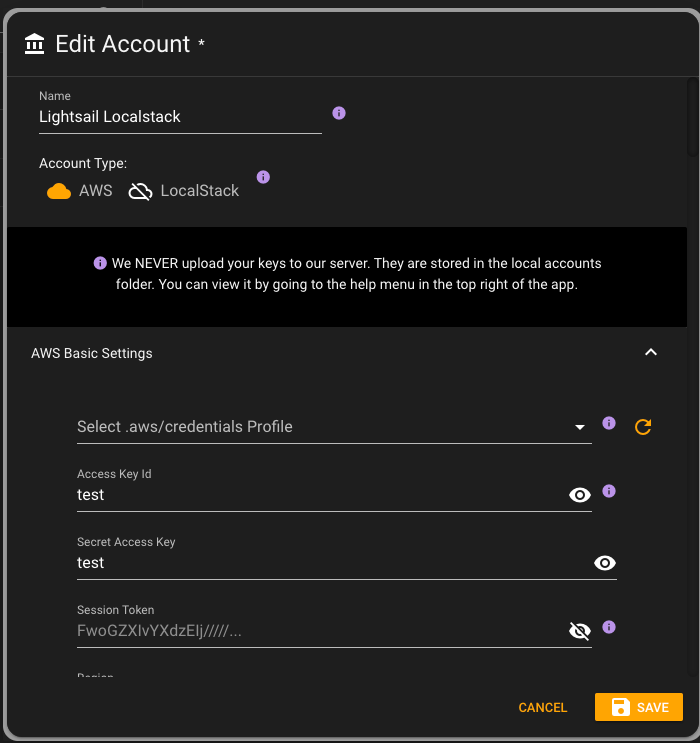
Once you click on this, you will see the edit account, where you can name it, and then put in access keys and secret access keys of test and test.
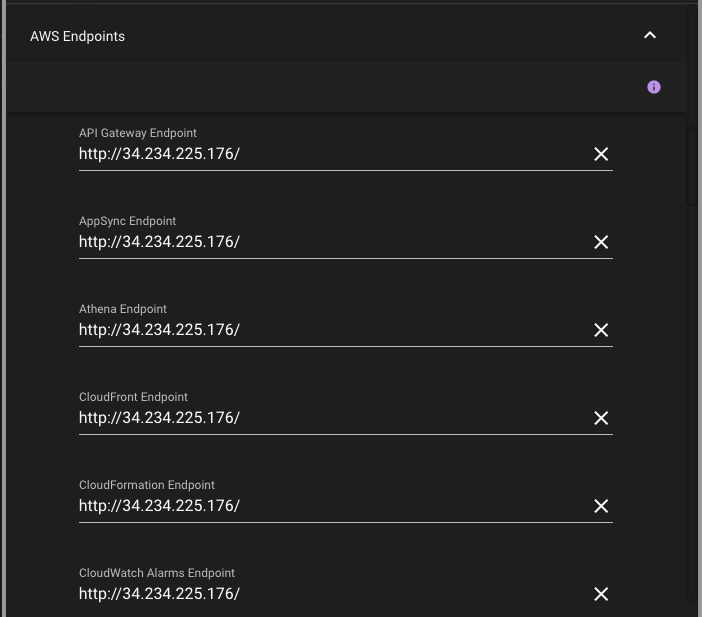
Then scroll down, and set the AWS endpoints for each service to the public IP address of your Lightsail instance.
Once you save this, let's go to the S3 page, and try to create a new bucket.
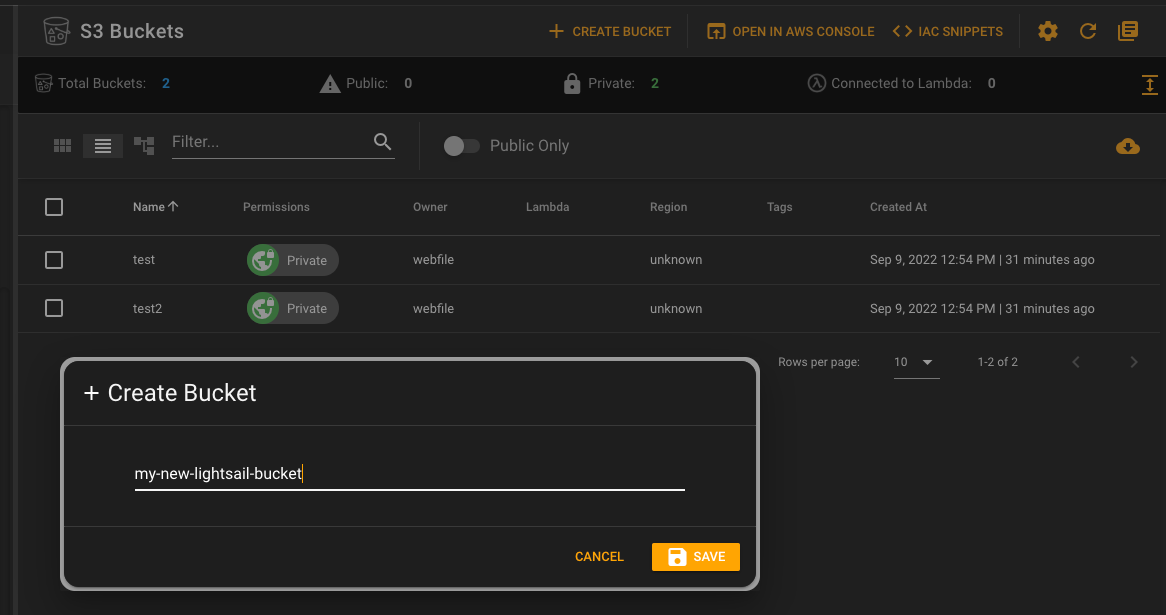
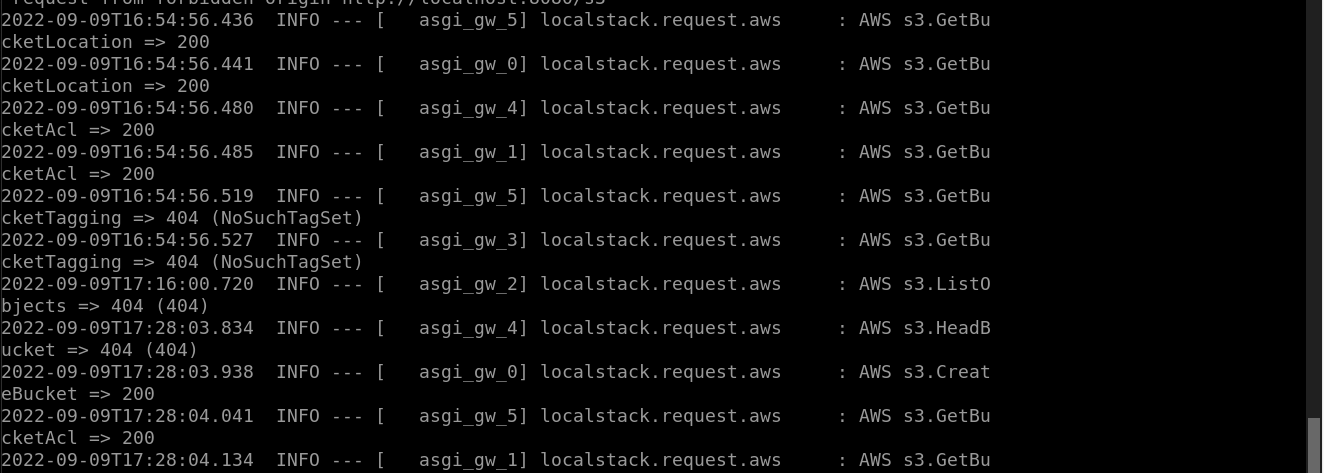
Once you press save, it will add the bucket. You can then go over to the Lightsail terminal and look at your docker logs and see the getting of buckets and the creating of the bucket.
# Conclusion
Having a docker instance of LocalStack running out in the cloud is a great way to save money, and have more of your development team get comfortable with using LocalStack. Now you can instantly fire up a LocalStack instance and everyone can connect. We hope you find this beneficial for your team!
