Create S3 Bucket On AWS
# Top 3 Ways To Create An S3 Bucket On AWS
# Overview
This article goes over the main ways to create an S3 bucket inside your AWS account. We'll go over creating a bucket with AWS Console, Commandeer, and AWS CLI. At the end, we'll go over the pros and cons of each approach to equip you with the best tools and knowledge.
# What is an S3 Bucket?
An S3 bucket is an AWS resource allowing you to store files organized by folders in the cloud. A bucket is global. It isn't tied to any specific AWS region. The bucket has a set of permissions allowing certain users to read, write or change permissions on the file. Once the files are uploaded into the bucket, you can serve the files from your client application or use the files from your backend services using AWS S3 API.
# Why creating s3 bucket manually
The manual way of creating your bucket may not be as exciting as creating it automatically with tools like Ansible or Serverless, which we will go over in the next tutorial. That being said, creating your bucket manually allows you to create a prototype quickly without having additional tools installed and it's the quickest option to create one-off buckets. Where this strategy falls short is when you need to create multiple buckets or if you need to create the same kind of buckets in another AWS account. For which, the IAC tools like Ansible or Serverless are a better fit.
# How to create a bucket
In order to create a bucket, you'll need a client to issue a request to AWS. There are several S3 client applications available. Let's go over each option.
# Most Efficient: Create Bucket using Commandeer
The most efficient way to create a bucket from a Desktop GUI is by using the Commandeer desktop app available for download here. Commandeer is build by developers for developers. It minimizes the number of steps it takes to create a bucket choosing the most common default options to keep your bucket secure.
# Get Commandeer
Go to the Commandeer download page and download Commandeer for your platform. Once you have the app installed, just follow the Commandeer Getting Started Guide to add your AWS keys to it.
# Create a bucket
Creating a bucket in Commandeer is pretty simple. Navigate to S3 in your Side Navigation on the left under the AWS menu. From the S3 page, click on the 'Add Bucket' button with a plus sign. Enter your bucket name and hit save. A newly created bucket is then added to the list of buckets. Clicking on the bucket itself gets you to the bucket detail page where you can see some basic information and change permissions on the bucket as you wish.
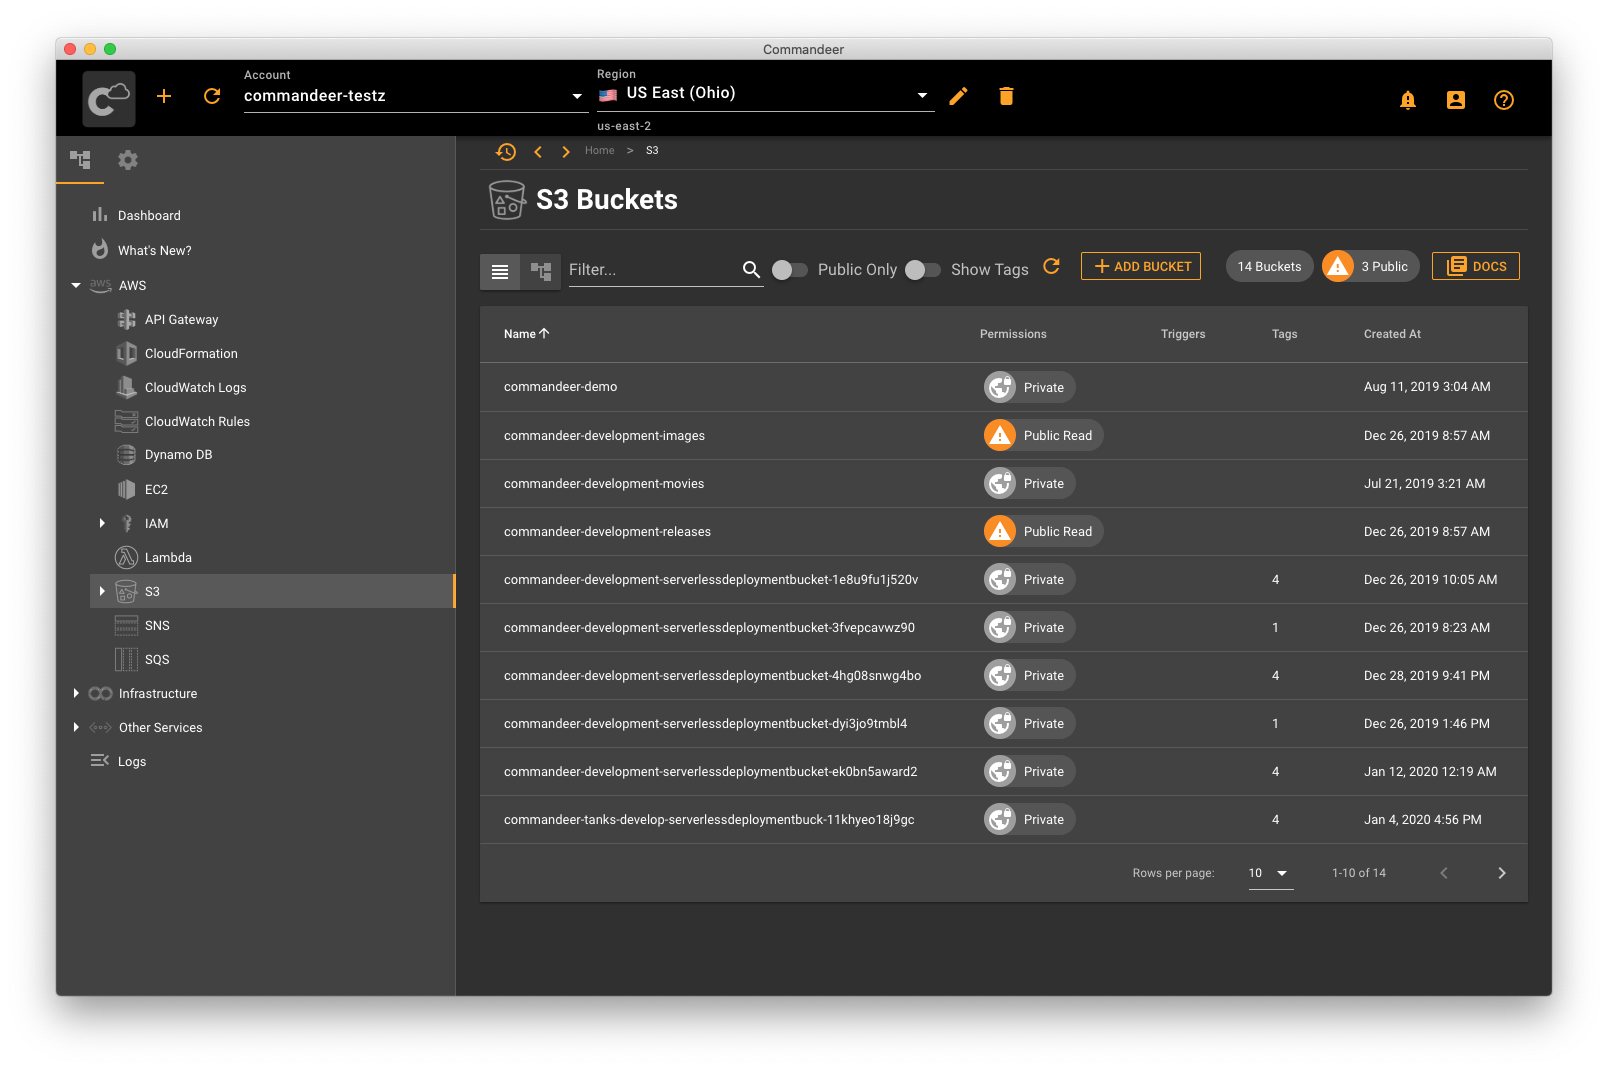
List some existing buckets in Commandeer
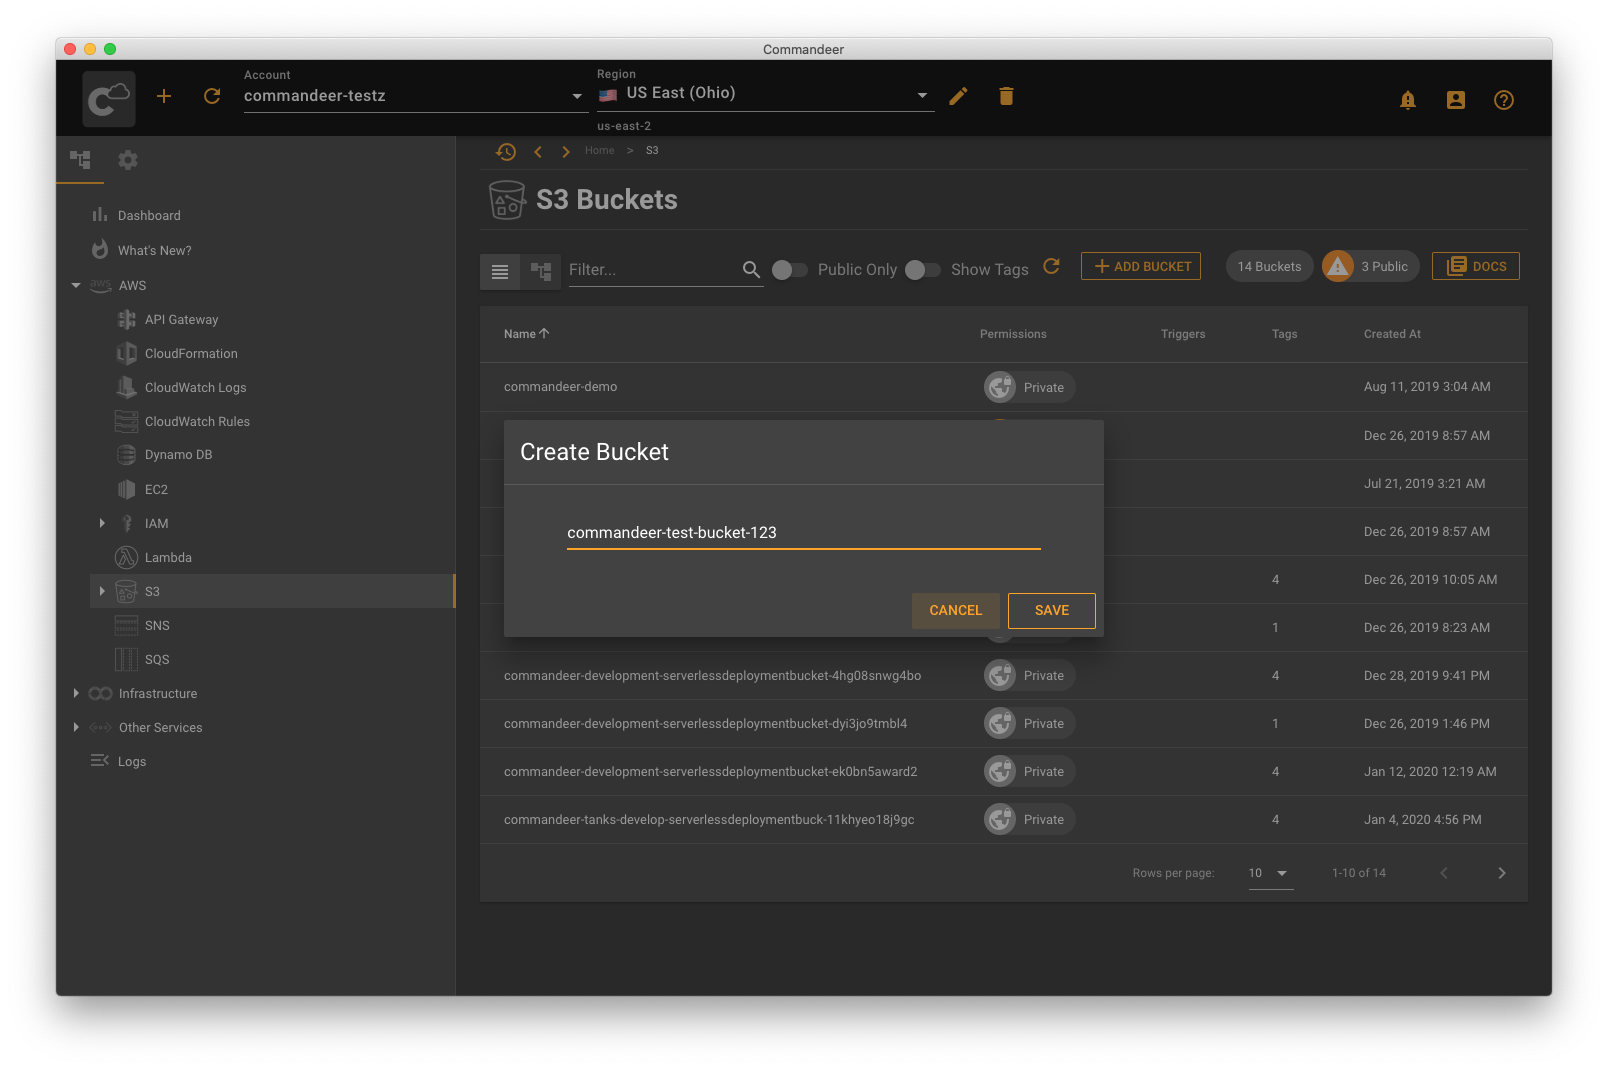
Entering the name for a new bucket to create
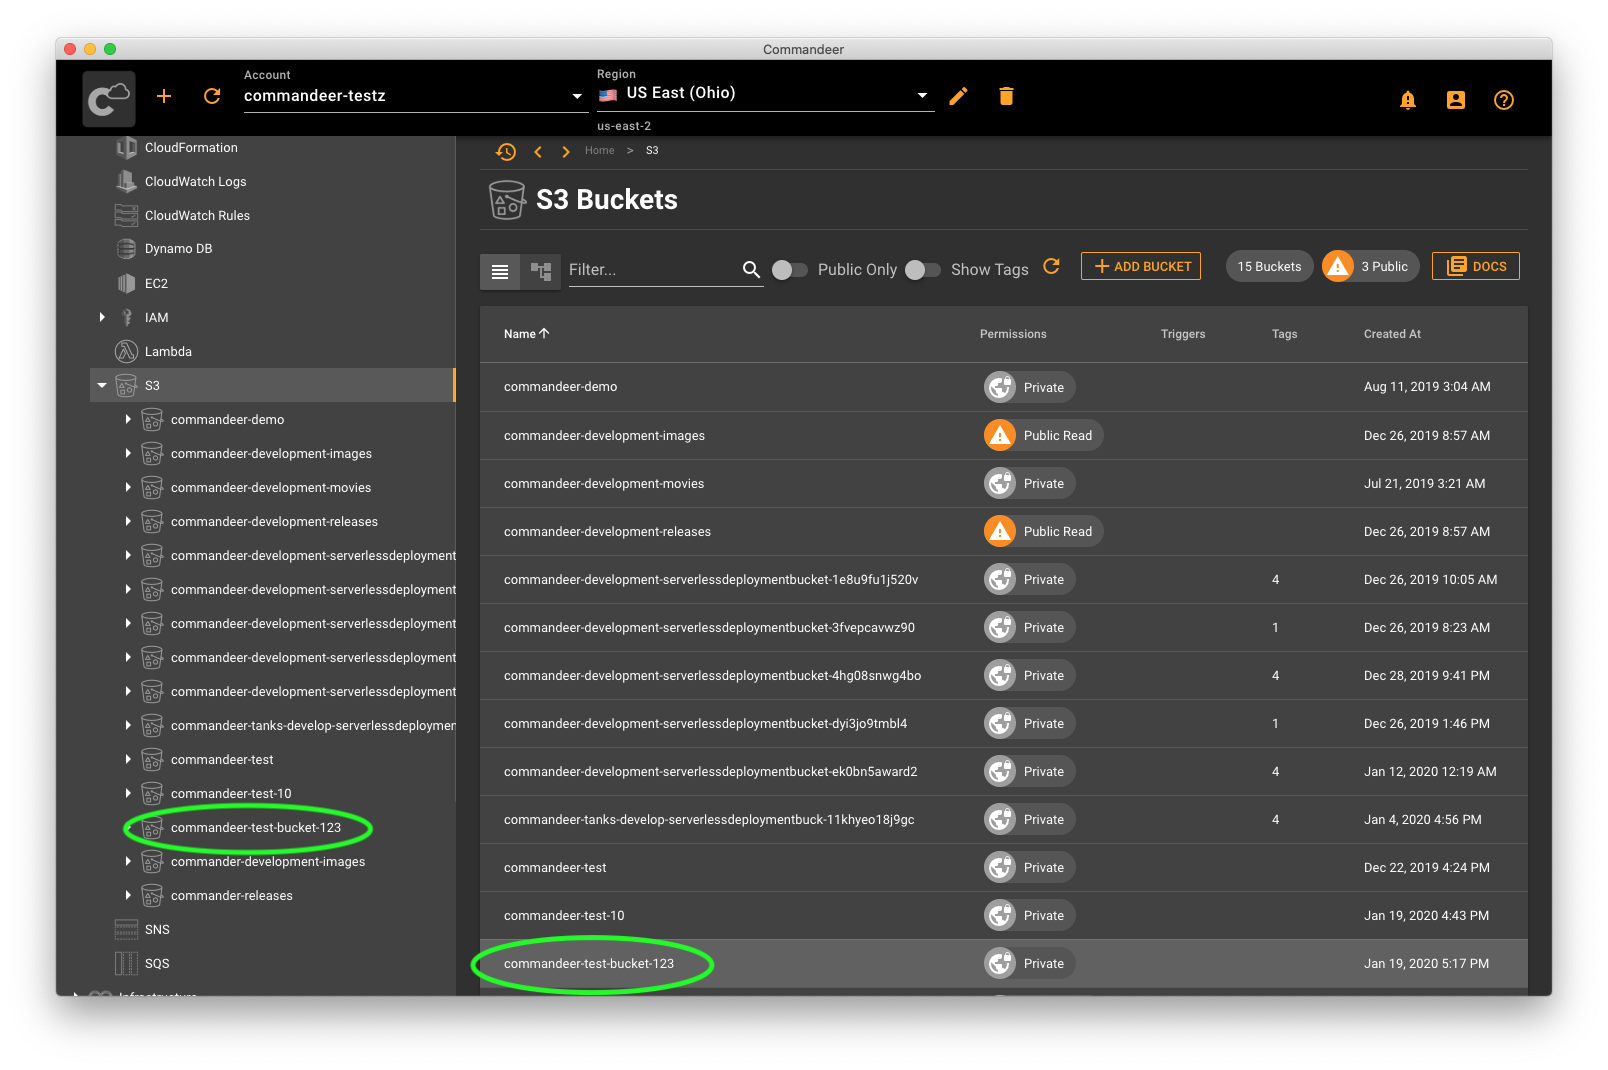
A newly created bucket shows up in the table and in the side navigation panel
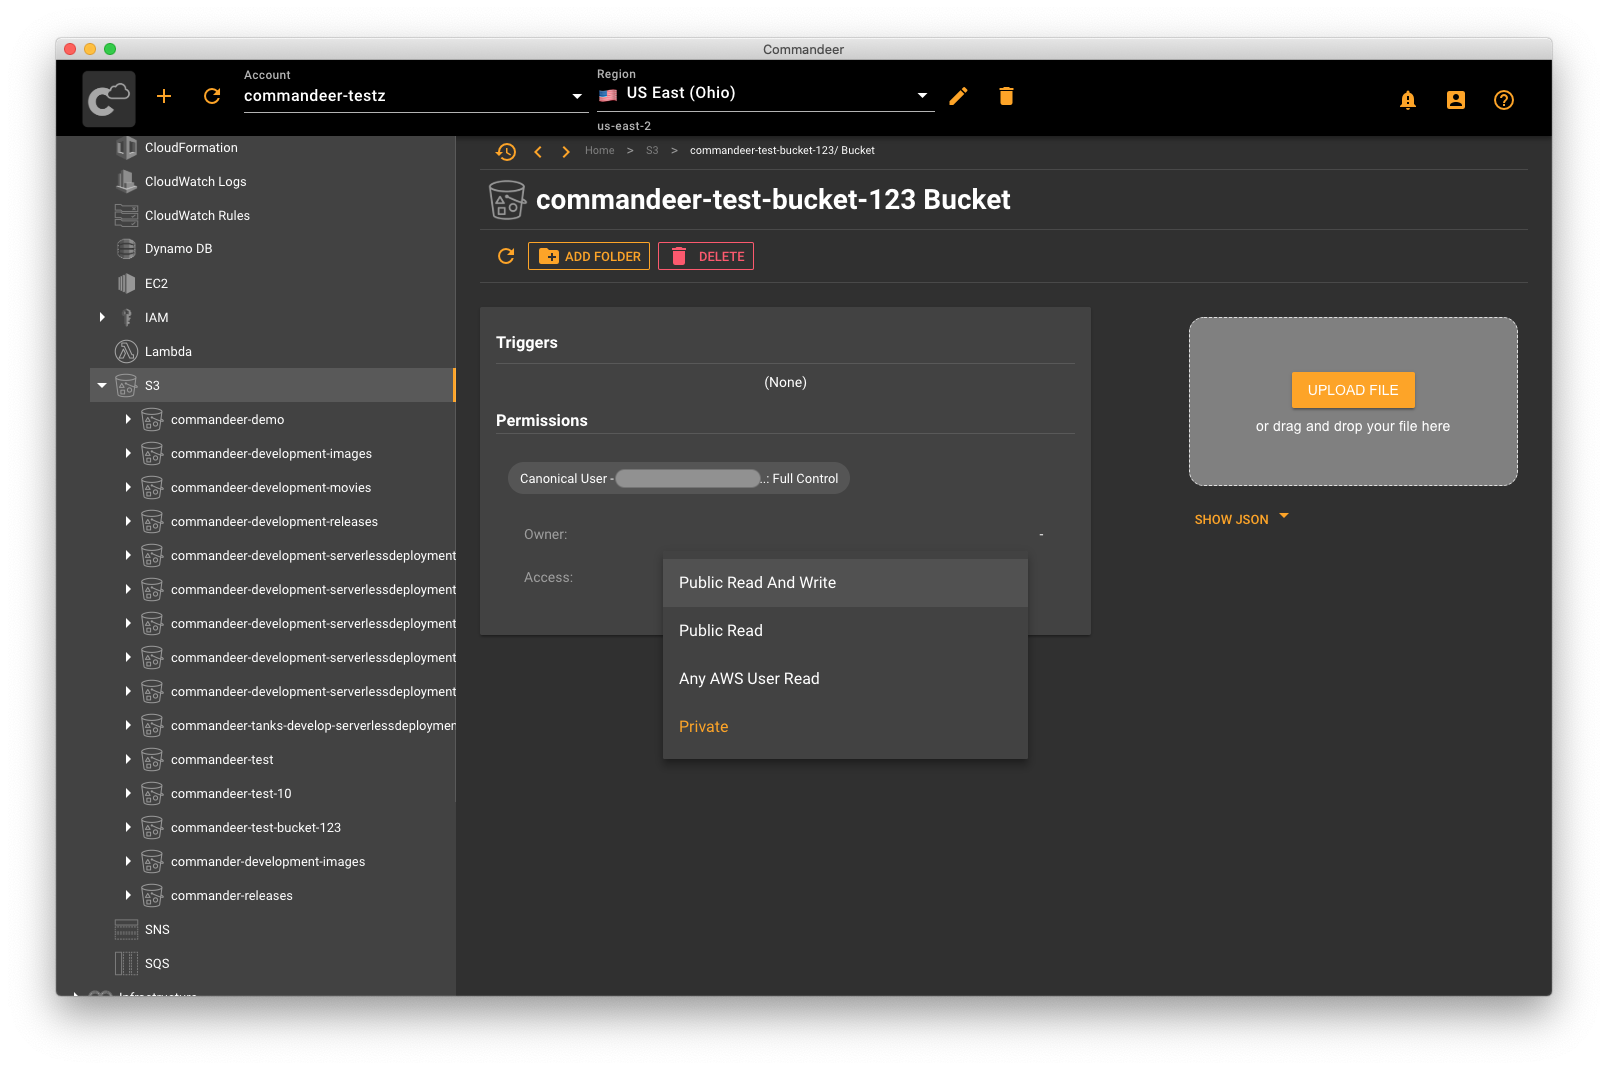
Changing bucket permissions on the bucket detail screen
# Pros and Cons Commandeer
Commandeer is a fantastic option for creating and managing your S3 buckets. With an intuitive user interface and rich feature set, Commandeer is a great tool to have in your developer toolbox for dealing with S3 in general. On the other hand, Commandeer requires an app download for your computer. If installing a developer productivity app on your computer is not an option, you may want to look into using the AWS Console Website method instead.
# Runner Up: Create Bucket in the AWS Console
Runner up for manual bucket creation is AWS Console. AWS Console is a website provided by AWS to manage AWS resources. The process of creating a bucket is more involved and it allows us to customize more settings along the way. Once you're logged into the AWS console, choose the S3 service and click 'Create Bucket'. Enter the name for your bucket and click next. On the next screen, you can configure some bucket options. Sticking with some default options works well and we can click next. The next screen allows us to set our permissions. If the default permissions work for you, feel free to click next to continue. On the review screen, you'll see the summary of everything we went through. If everything looks good, just click create bucket. Once the bucket is created you'll be redirected to the bucket list screen with your newly created bucket selected.
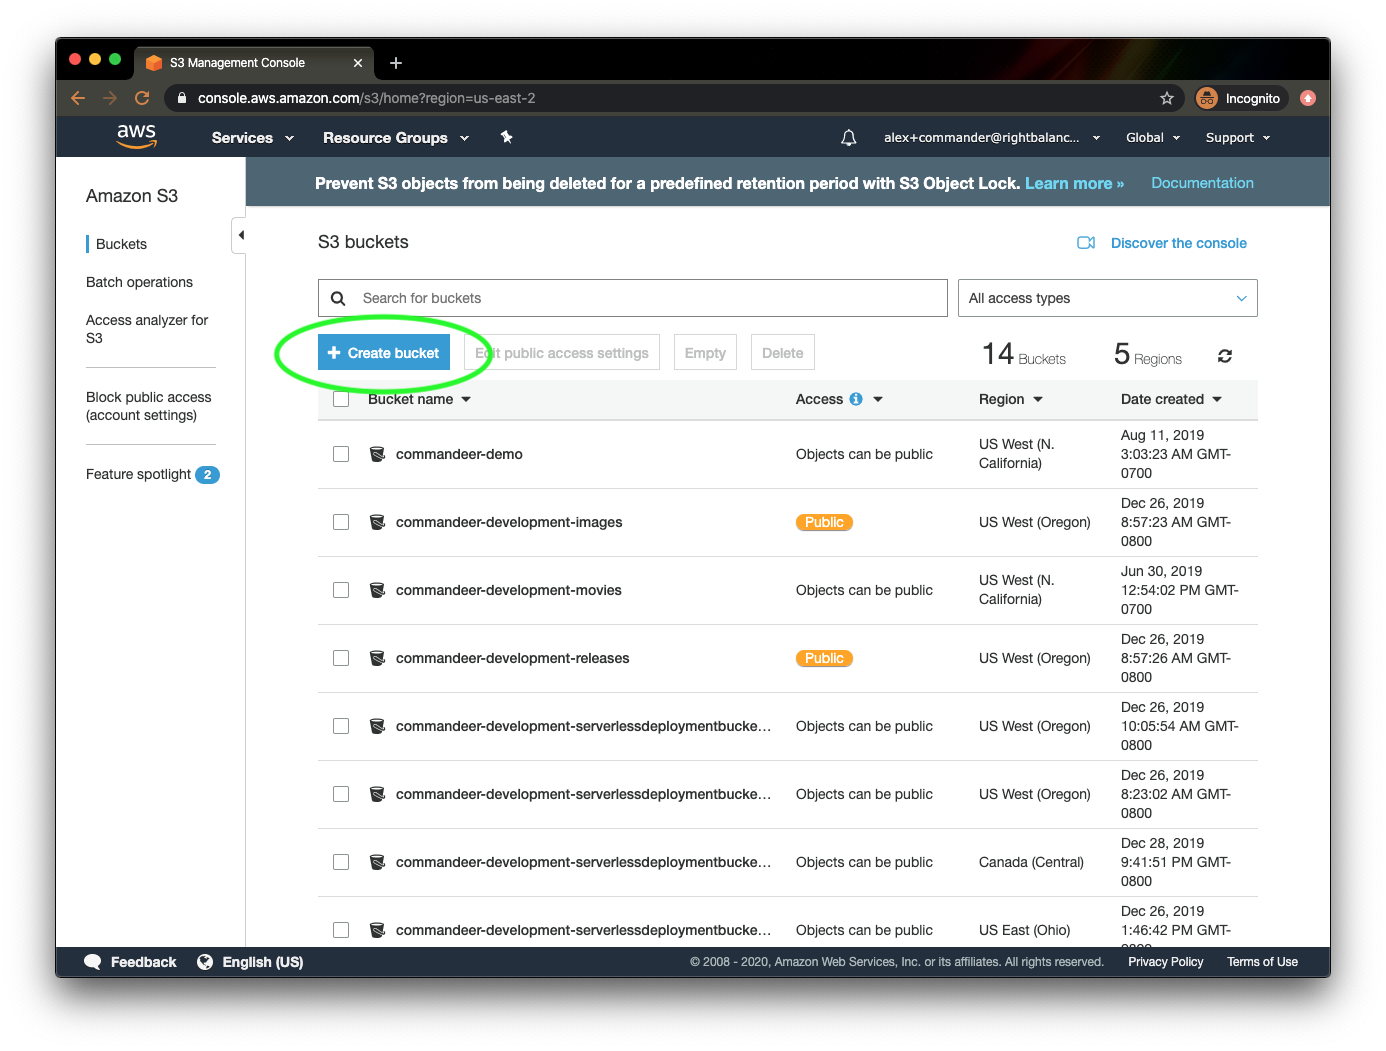
Looking at some existing buckets on AWS Console
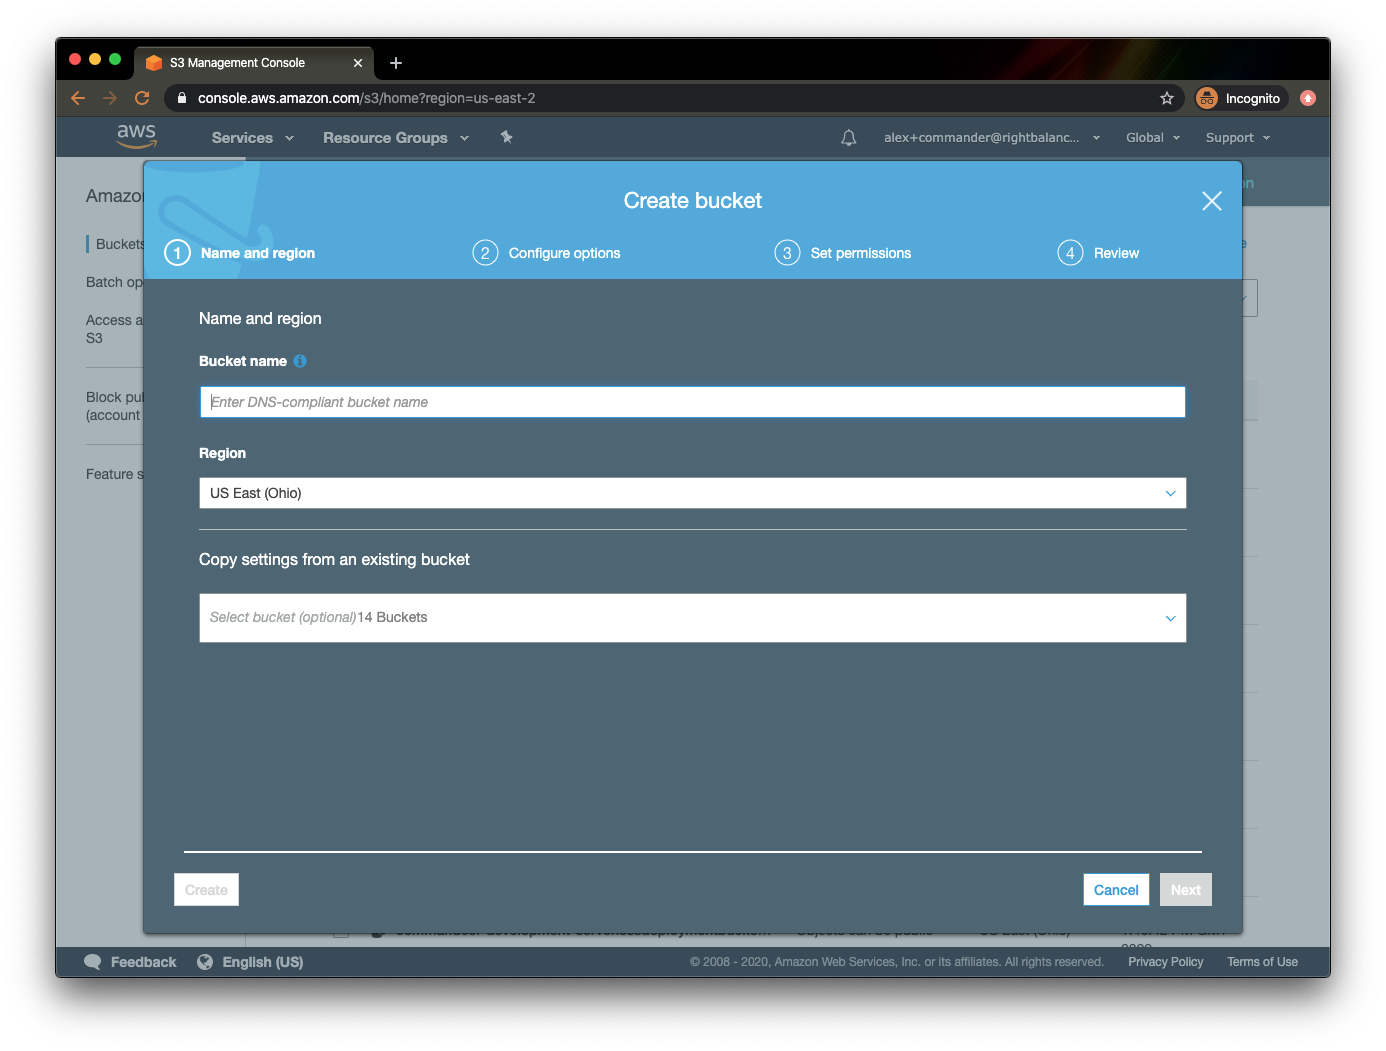
Entering a name for the newly created bucket on AWS Console
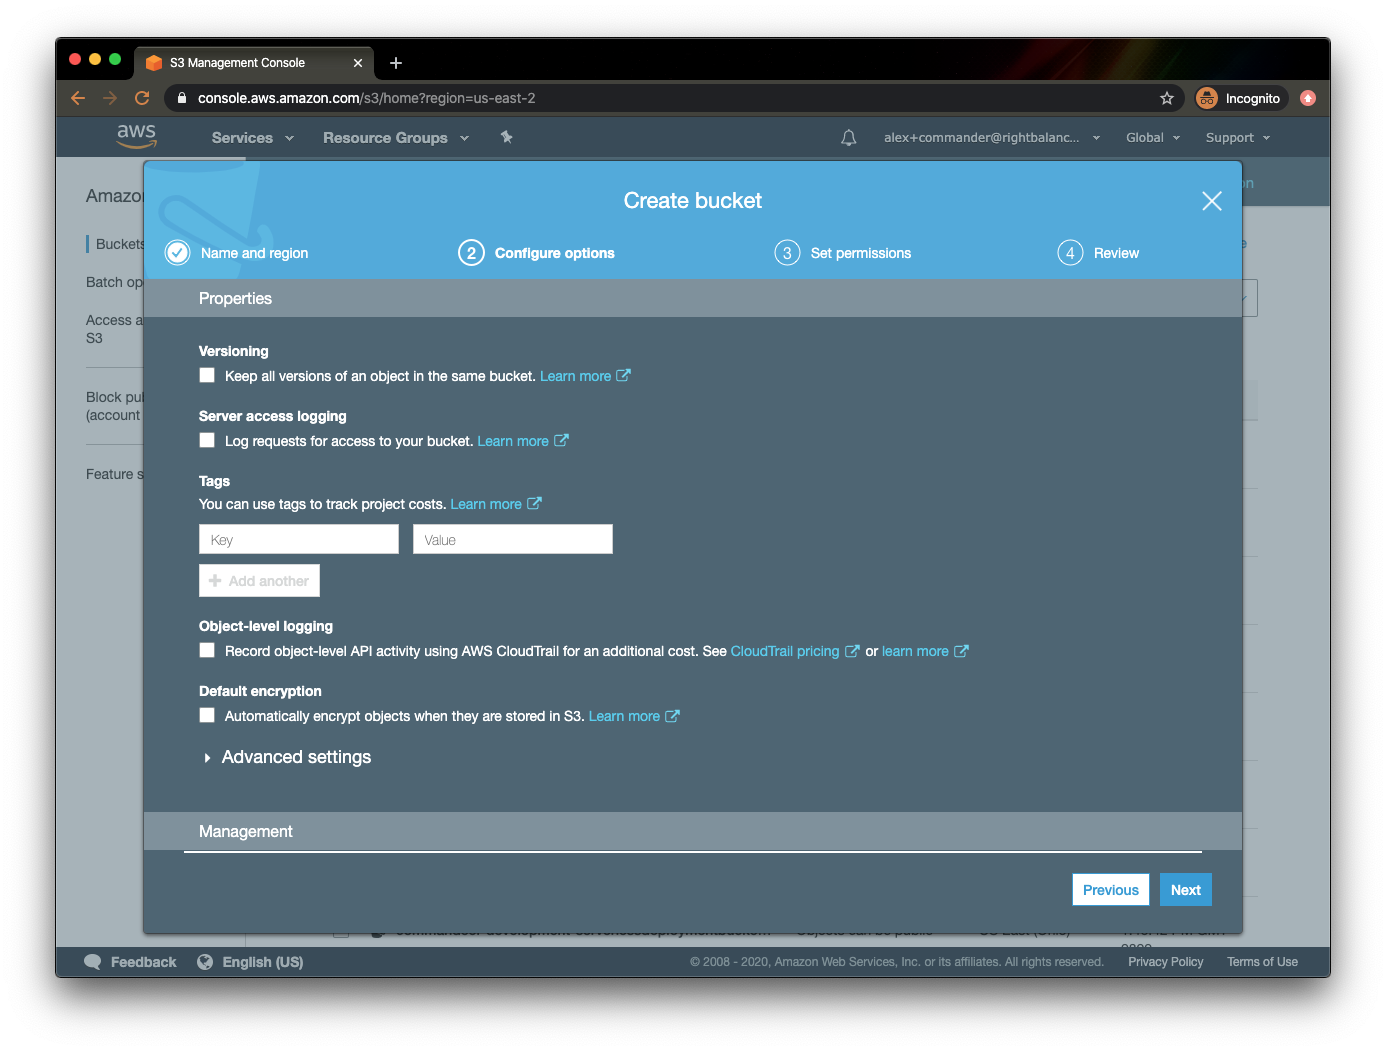
Configuring some options for the new bucket
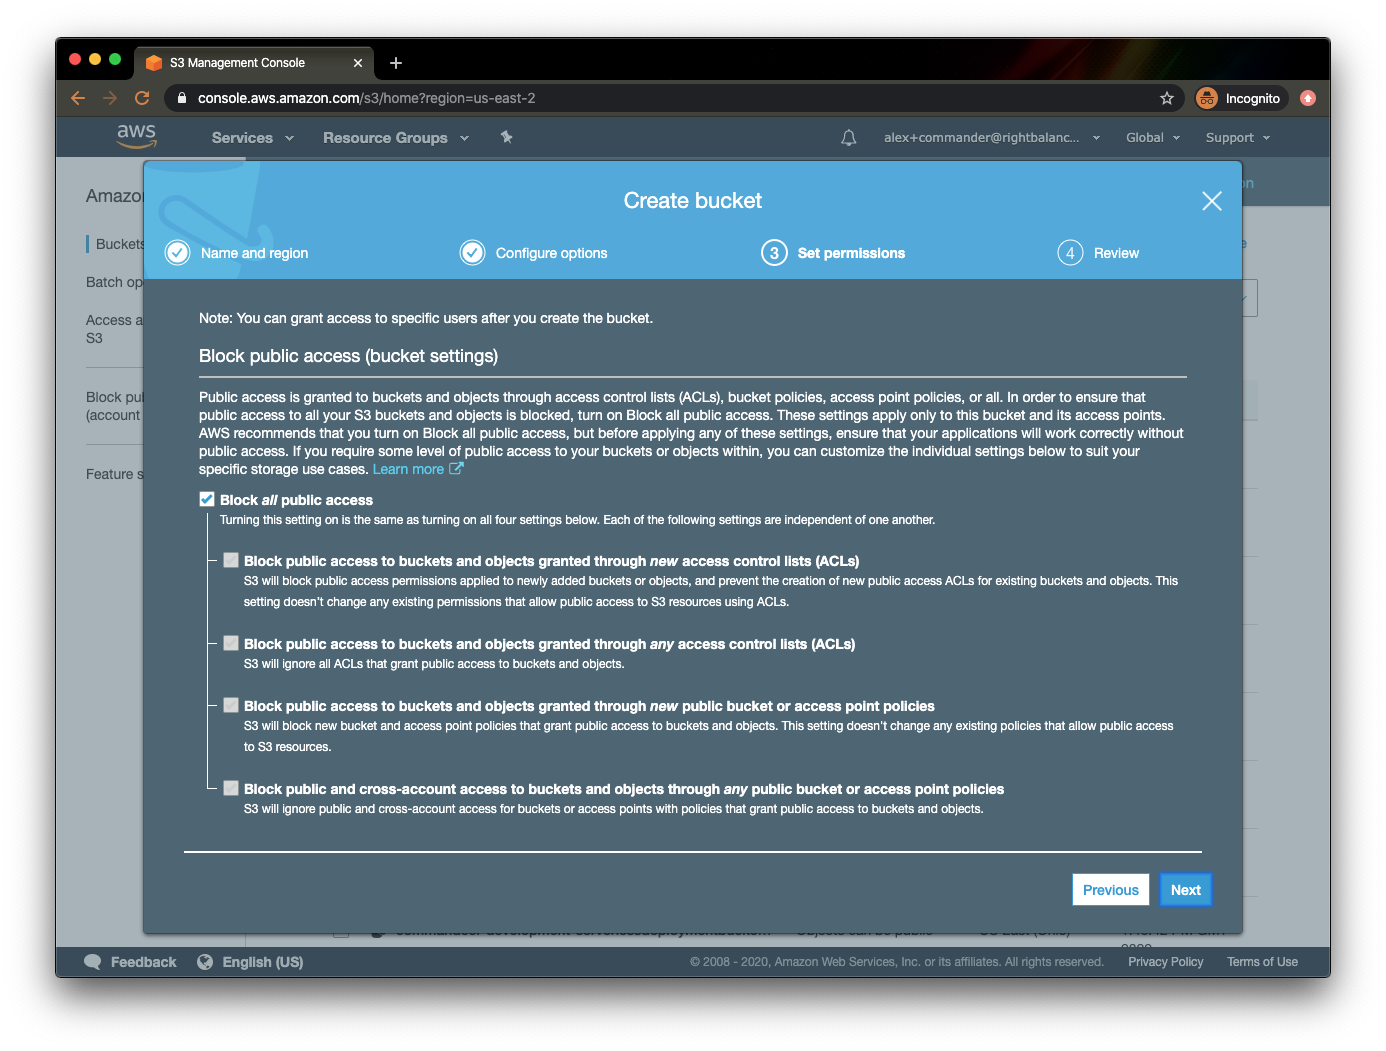
Setting some permissions on a bucket
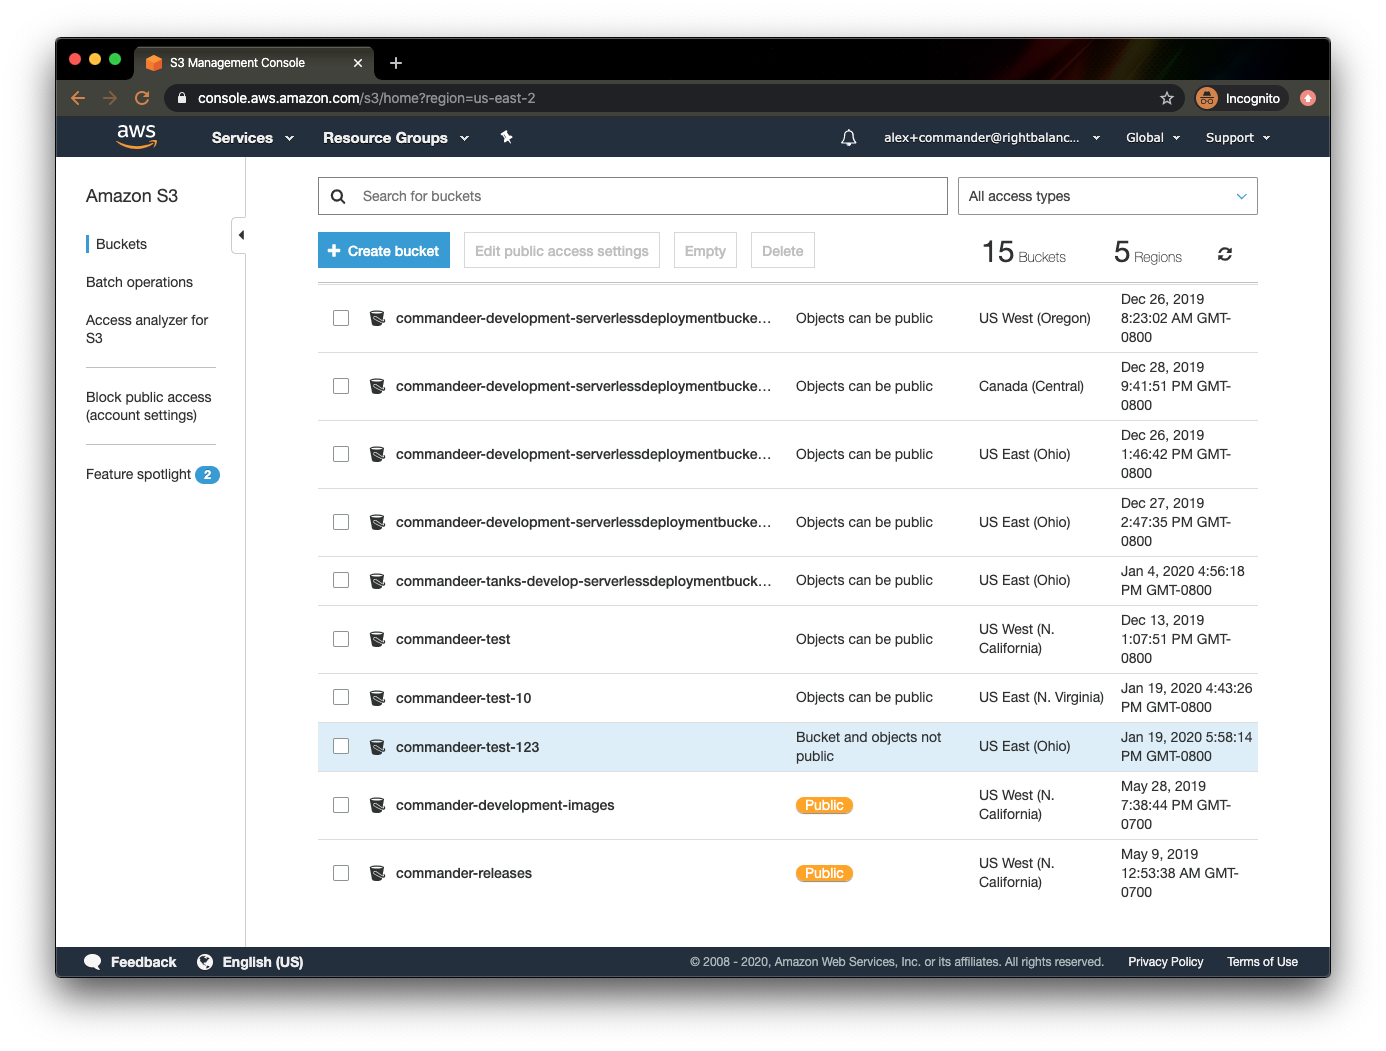
The new bucket is created and it shows up in the bucket list
# Pros and Cons of AWS Console
Despite the hard to navigate UI, the biggest advantage of using the AWS Console is the absence of any installation process. It's just a website you go to in your browser to get the job done. That being said, the ease of going to the website comes at the cost of a complicated login mechanism requiring AccountId, username, and password. In addition to it, bucket creation using the AWS Console takes more steps. The user interface is not very intuitive which makes the bucket creation process even slower.
# For Automation: Create Bucket with AWS CLI
Even though it's easy to create a bucket on S3 manually, sometimes we need to automate the bucket creation as a part of a CI/CD pipeline or another setup process. There are multiple ways to do it and we'll go over some advanced IaC techniques in the next tutorial. That being said, a quick and easy way to create a bucket is using AWS CLI.
# Install AWS CLI
The first step is to install AWS CLI onto your development machine. Here is a quick summary of the commands you'll need to run depending on your target platform.
# Prerequisites
Having Python available on your machine is the only pre-requisite. Run the following command to check if you already have Python installed.
python --version
If it prints the version of Python installed, it means you already have it. If there is no output printed it means you don't have Python installed. You can download and install it from the Python downloads page.
# Linux and macOS
AWS provides a bundled installer for both Linux and macOS. Run the following commands to install it. It'll prompt you for your password on the last step.
curl "https://s3.amazonaws.com/aws-cli/awscli-bundle.zip" -o "awscli-bundle.zip"
unzip awscli-bundle.zip
sudo ./awscli-bundle/install -i /usr/local/aws -b /usr/local/bin/aws
# Windows
Windows installation is quite straightforward, just download the MSI Installer from AWS CLI User Guide and run the installer. A complete set of installation instructions is available on the AWS CLI User Guide.
# Configure AWS CLI
Run the following command to configure AWS CLI on your machine. You'll need your AWS keys which you can obtain from the AWS IAM Console. You can follow the section 'Obtaining AWS Credentials' on Commandeer Getting Started Guide.
# Create a bucket with AWS CLI
Run the following command to create a bucket replacing YOUR_UNIQUE_BUCKET_NAME with your unique name for your bucket. Note that if you have multiple profiles, you may want to prefix your command with AWS_PROFILE=YOU_PROFILE_NAME.
aws s3 mb s3://YOUR_UNIQUE_BUCKET_NAME
# Pros and Cons of AWS Console
Creating a bucket using the command line is a great way to create your bucket automatically as a part of your development pipeline. On the other side, it requires some setup as you can see. That being said spending some time to set up your tooling upfront pays dividends in the long run.
# Recap
AWS S3 is a great service to manage your files in the cloud. It's cost efficient, has a full API to work with, and there are many different tools working with S3. In order for us to manage our files, we need to create buckets to organize the files and folders. We went over three major ways to create a bucket on S3. Our recommended way to manually create a bucket is using Commandeer to make this process most efficient for developers. If you don't like to use new tools, you can use the good old AWS Console to create your buckets. If you would like to automate the bucket creation, you can do so by using AWS CLI. As you can see, it all comes down to using the right tool for the job. Now you're equipped with a variety of tools for each occasion. Have fun and stay productive!
