Connecting DynamoDB Streams To Lambda using Serverless and Ansible
# Connecting DynamoDB Streams To Lambda using Serverless and Ansible
# Overview
DynamoDB is a great NoSQL database from AWS. One of the great features of DynamoDB is the ability to stream the data into a Lambda. Lambda can process the incoming stream data and run some business logic. An example of this pattern is sending an email from a Lambda when the new record is saved into a DynamoDB table.
Serverless is a fantastic framework for writing your Serverless infrastructure as code. It's perfect for creating, packaging, and deploying your lambdas based on a YAML configuration.
In this tutorial, we'll create our DynamoDB table with Ansible and connect our Lambda to the table using Serverless. Why not using Serverless to create a DynamoDB table too? Great question. Even though it's possible to do so, we recommend creating your durable resources like DynamoDB tables using a separate tool like Ansible. This way if you want to recreate your Lambdas, you can do so without affecting your data stored in DynamoDB.
# DynamoDB Table Ansible Configuration
Let's create a Dynamo table with Ansible. Here is our main playbook.yml file.
---
- hosts: localhost
  remote_user: bob
  tasks:
    - import_tasks: dynamo-tables.yml
playbook.yml - the entry point for our Ansible run.
And here is the dynamo-tables.yml file containing the actual configuration for our Battle table.
- name: Create Battle table
  dynamodb_table:
    name: Battle
    hash_key_name: id
    hash_key_type: STRING
    read_capacity: 1
    write_capacity: 1
dynamo-tables.yml - contains the Battle table configuration.
# Serverless Configuration
The Serverless configuration is straightforward. Let's start with package.json
{
  "dependencies": {
    "aws-sdk": "2.556.0"
  },
  "devDependencies": {
    "@types/aws-lambda": "8.10.24",
    "serverless-dynamo-stream-plugin": "0.1.4",
    "serverless-plugin-typescript": "1.1.7",
    "typescript": "3.6.4"
  }
}
package.json - package configuration for our Serverless project
One package to note here is serverless-dynamo-stream-plugin. This plugin allows us to connect our Lambda with a pre-existing DynamoDB table created by our Ansible code in the previous step. This way you can keep your Dynamo tables separate from your Serverless infrastructure. And you're able to IAC your setup making it fully automatic 💪.
The next stop is the serverless configuration file itself.
service: commandeer-docs-dynamo-stream

provider:
  name: aws
  runtime: nodejs10.x
  memorySize: 256
  stage: ${opt:stage, 'development'}
  timeout: 30
  versionFunctions: false

plugins:
  - serverless-dynamo-stream-plugin
  - serverless-plugin-typescript

functions:
  tankHandler: ${file(./handlers/tankHandler.yml):tankHandler}
Here we define our service and the provider at the top. The serverless-dynamo-stream-plugin is added to the plugins section. Our tankHandler is added under functions which refers to the tank handler configuration file.
tankHandler:
  handler: handlers/tankHandler.process
  timeout: 900
  events:
    - existingDynamoStream:
        tableName: Battle
        streamType: NEW_IMAGE
        startingPosition: LATEST
tankHandler.yml - tank handler configuration
Besides defining the tank handler itself, we also define the existingDynamoStream event under the events section. This type of event comes from serverless-dynamo-stream-plugin npm we included earlier. It connects our lambda to Battle table with the stream type NEW_IMAGE which sends us some new DynamoDB records.
import { Context, Handler } from 'aws-lambda';

/**
 * @description handle some tank payload
 * @param event event object
 * @param context context object
 */
const process: Handler = async (event: any, context: Context) => {
  console.log('tankHandler.process', { event, context });

  try {
    const shot = {
      message: 'Boom! 💥',
      event,
    };
    context.succeed(shot);
  } catch (exception) {
    context.fail(exception);
  }
};

export { process };
tanksHandler.ts - tank handler code
Last but not least, here is our tankHandler code itself. Wow, we defined a lot of yaml and now we finally have some Typescript written. Note the console.log statement printing tankHandler.process. We'll use it for our testing later on.
# Run Ansible
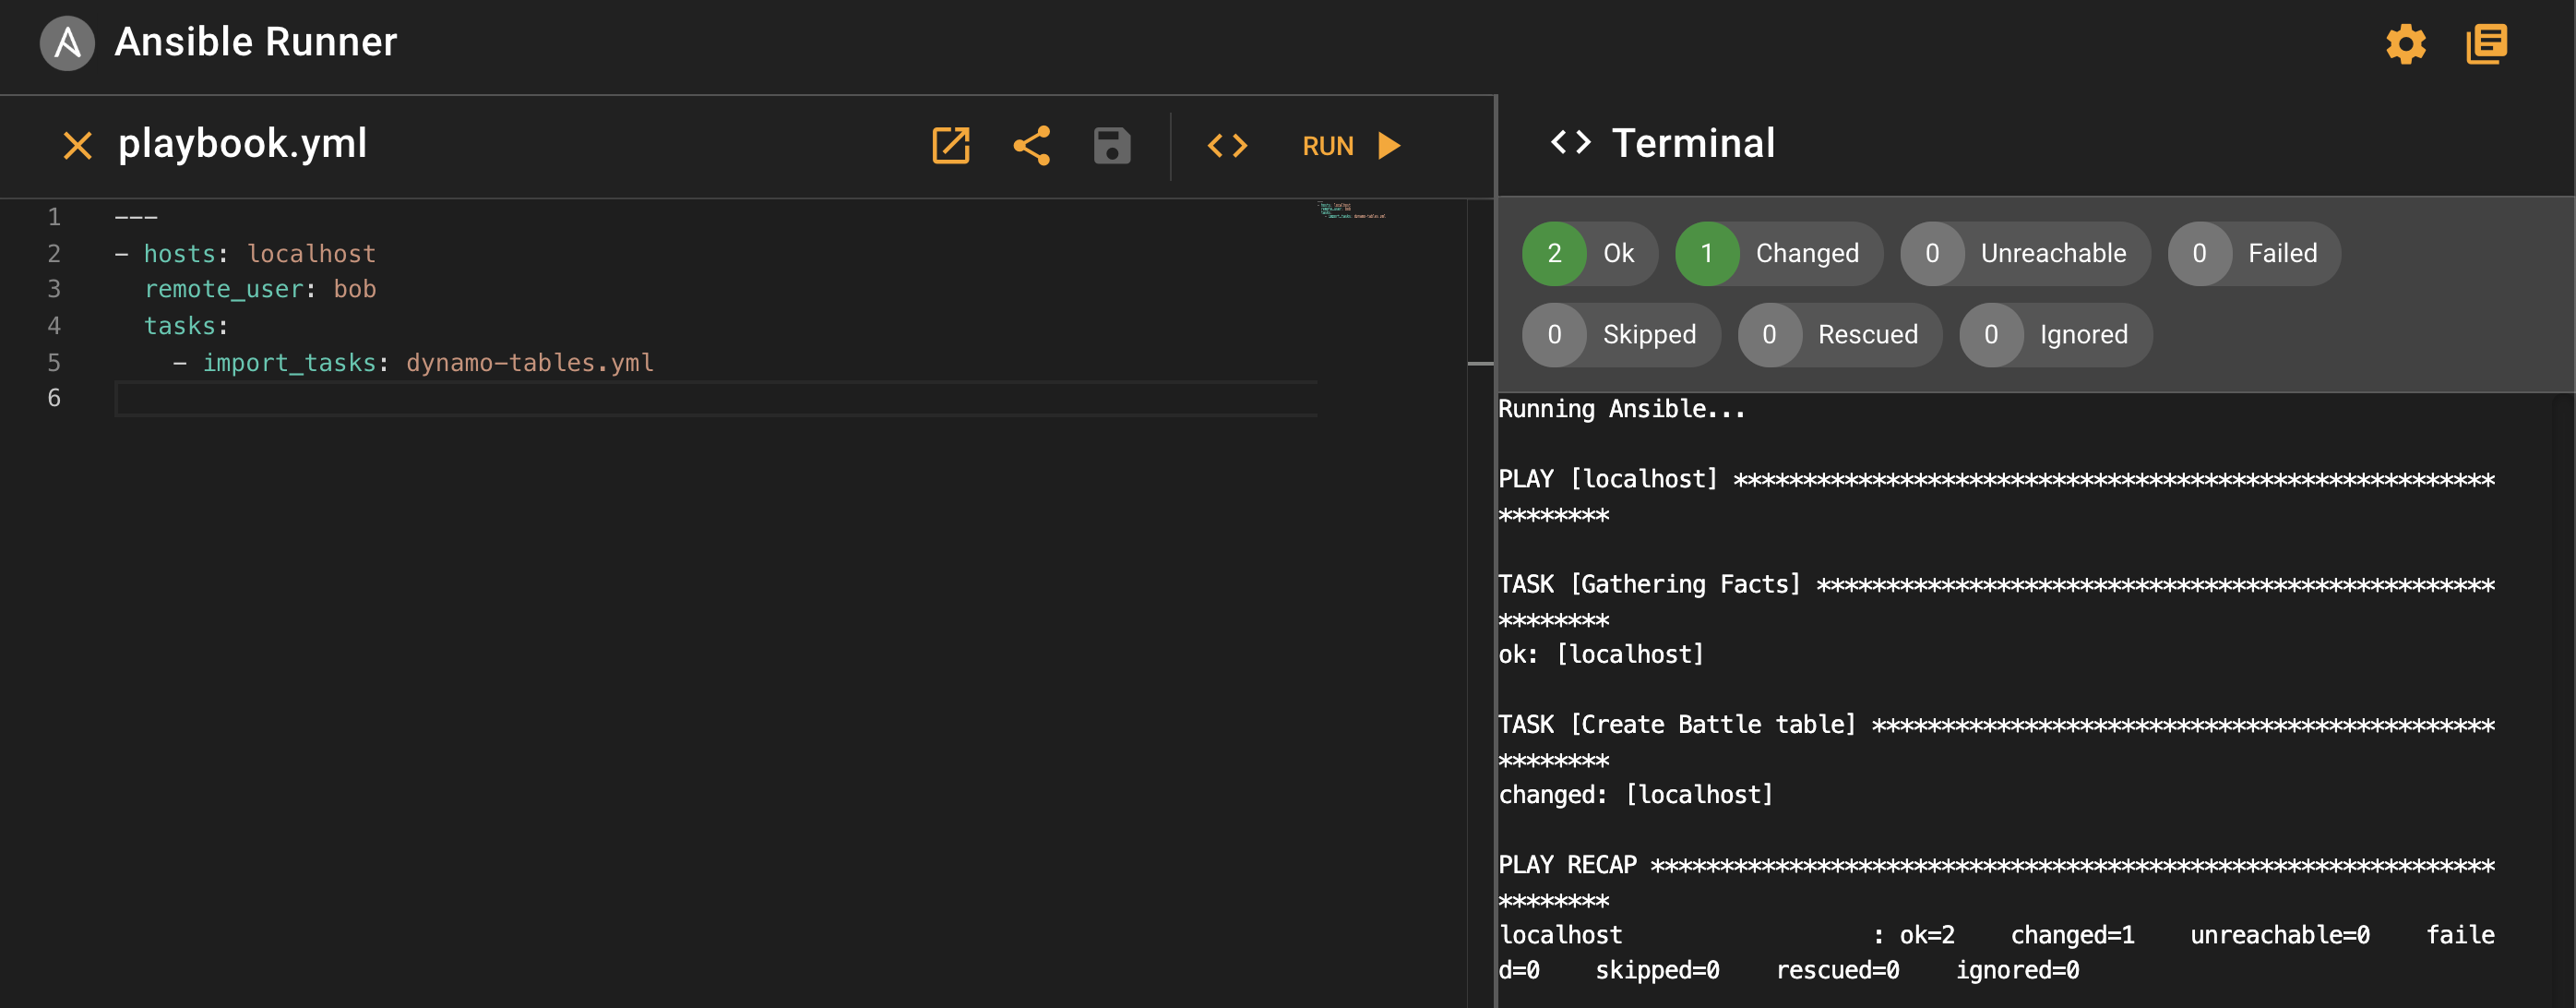
Clone or download our open source repo. The code for this project is located under sample-apps/dynamo-streams. Open Commandeer and navigate to Ansible -> Runner, choose the sample-apps/dynamo-streams/ansible/playbook.yml file from the project, and click Run. Once the run is complete, you'll see the result summary above the terminal output.
# Run Serverless
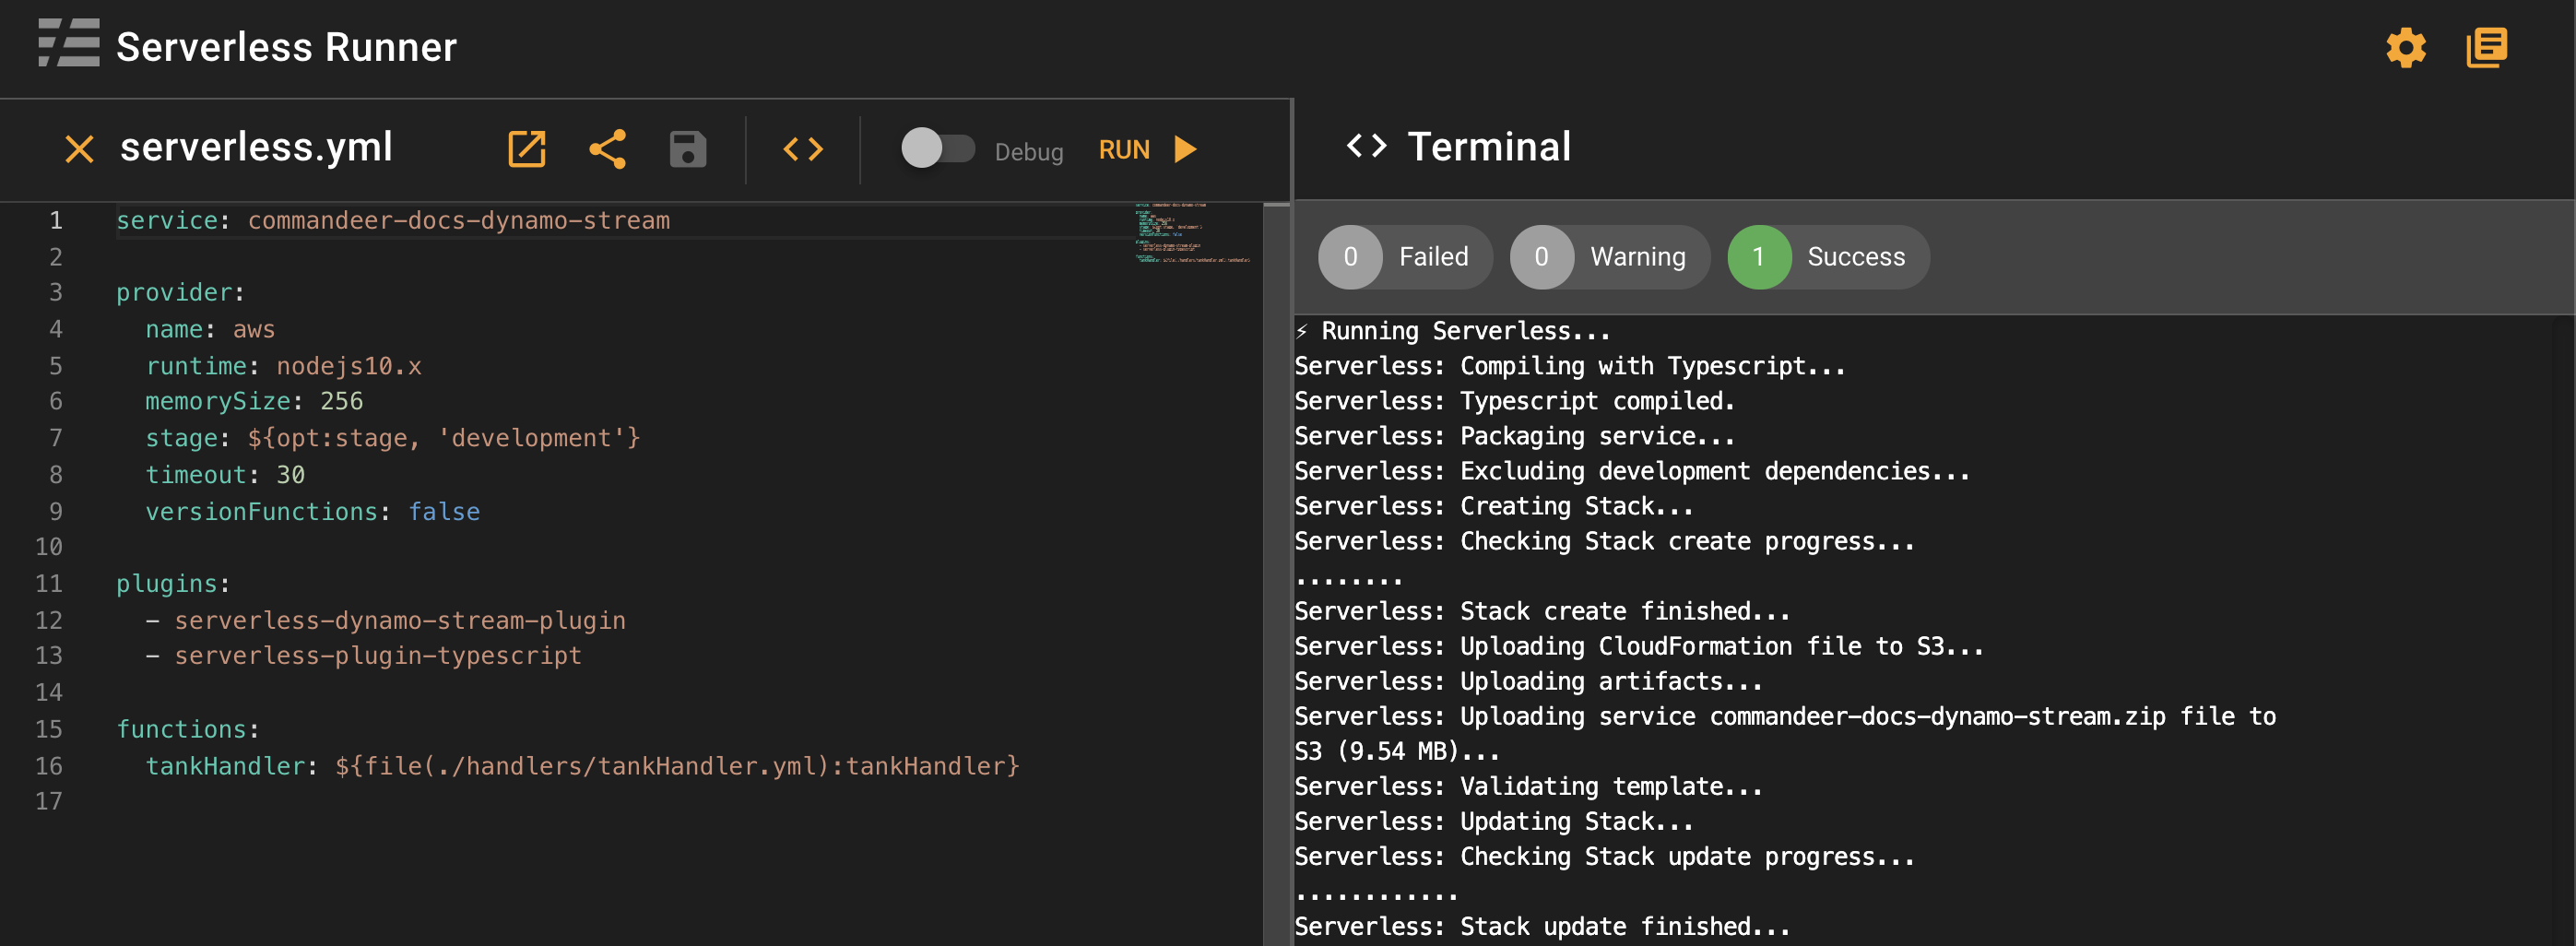
The next stop is running Serverless. Open your terminal, cd into sample-apps/dynamo-streams/serverless and run yarn install or npm install depending on the packaging tool of your choice. Then open Commandeer, navigate to Serverless -> Runner and choose your serverless file located at sample-apps/dynamo-streams/serverless/serverless.yml. Click run, once the run is finished, you'll see the summary on the right-hand side.
# Test Your Plumbing
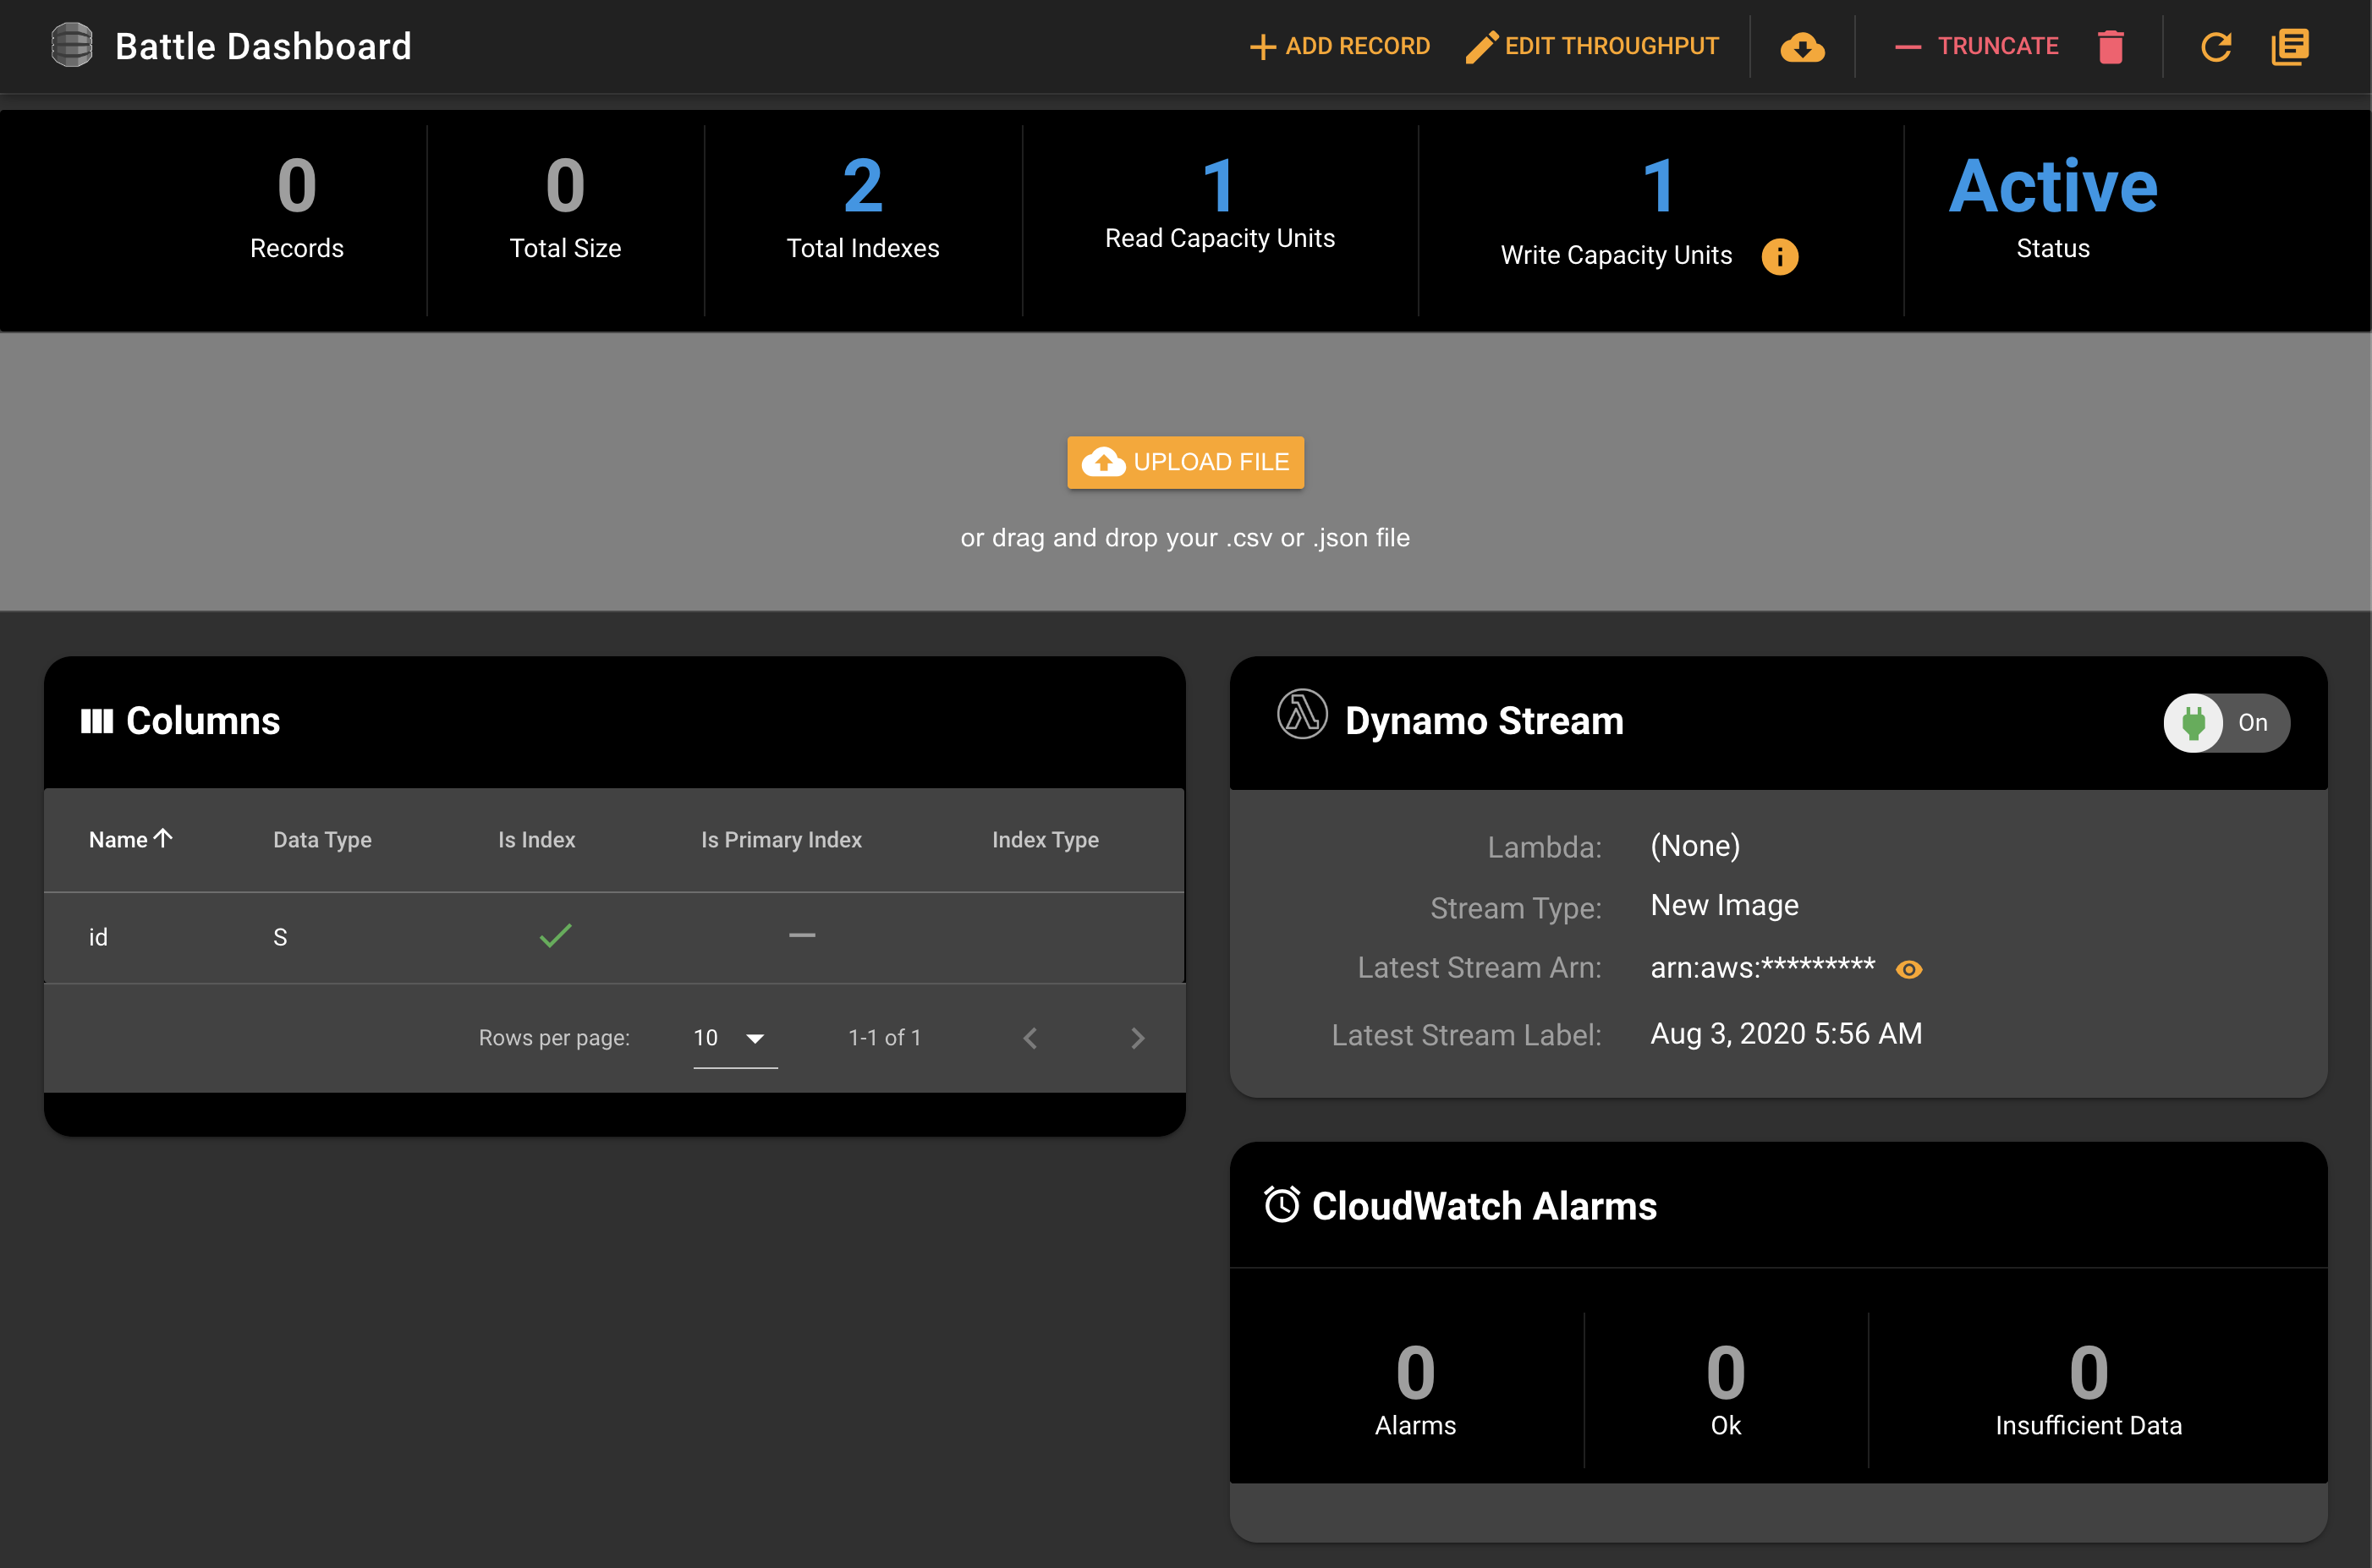
First, let's navigate to our newly created Dynamo table in Commandeer. Go to DynamoDB Dashboard, select your table from the list. From here you can check all parameters for your Battle table including our Dynamo Stream that shows as enabled.
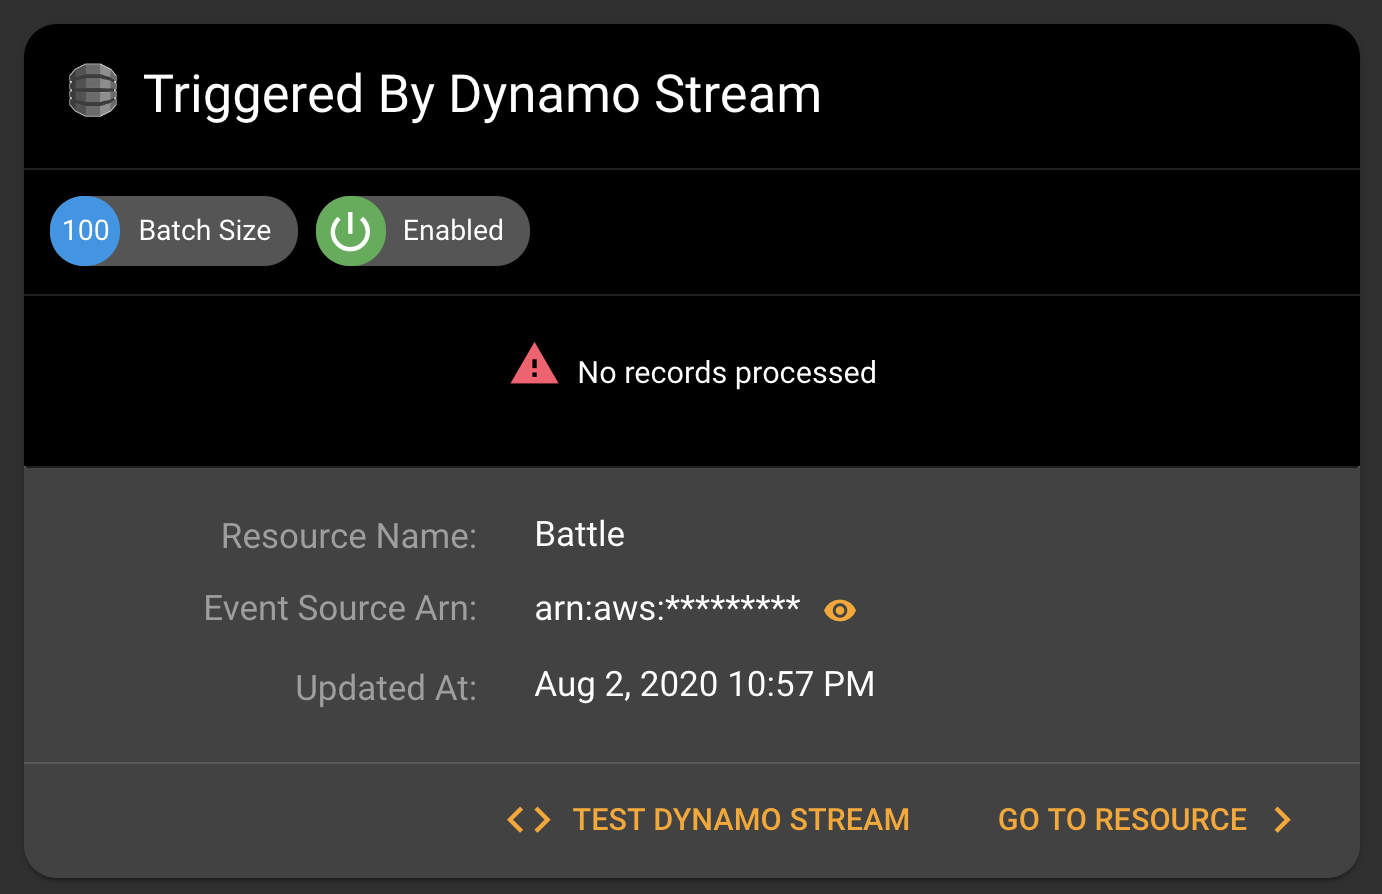
Next, go to Lambda from the side navigation and select your commandeer-docs-development-dynamo-stream-tankHandler lambda dashboard. Not only you can see your Lambda parameters. You can also see the Battle table stream connection under DynamoDB Streams section.
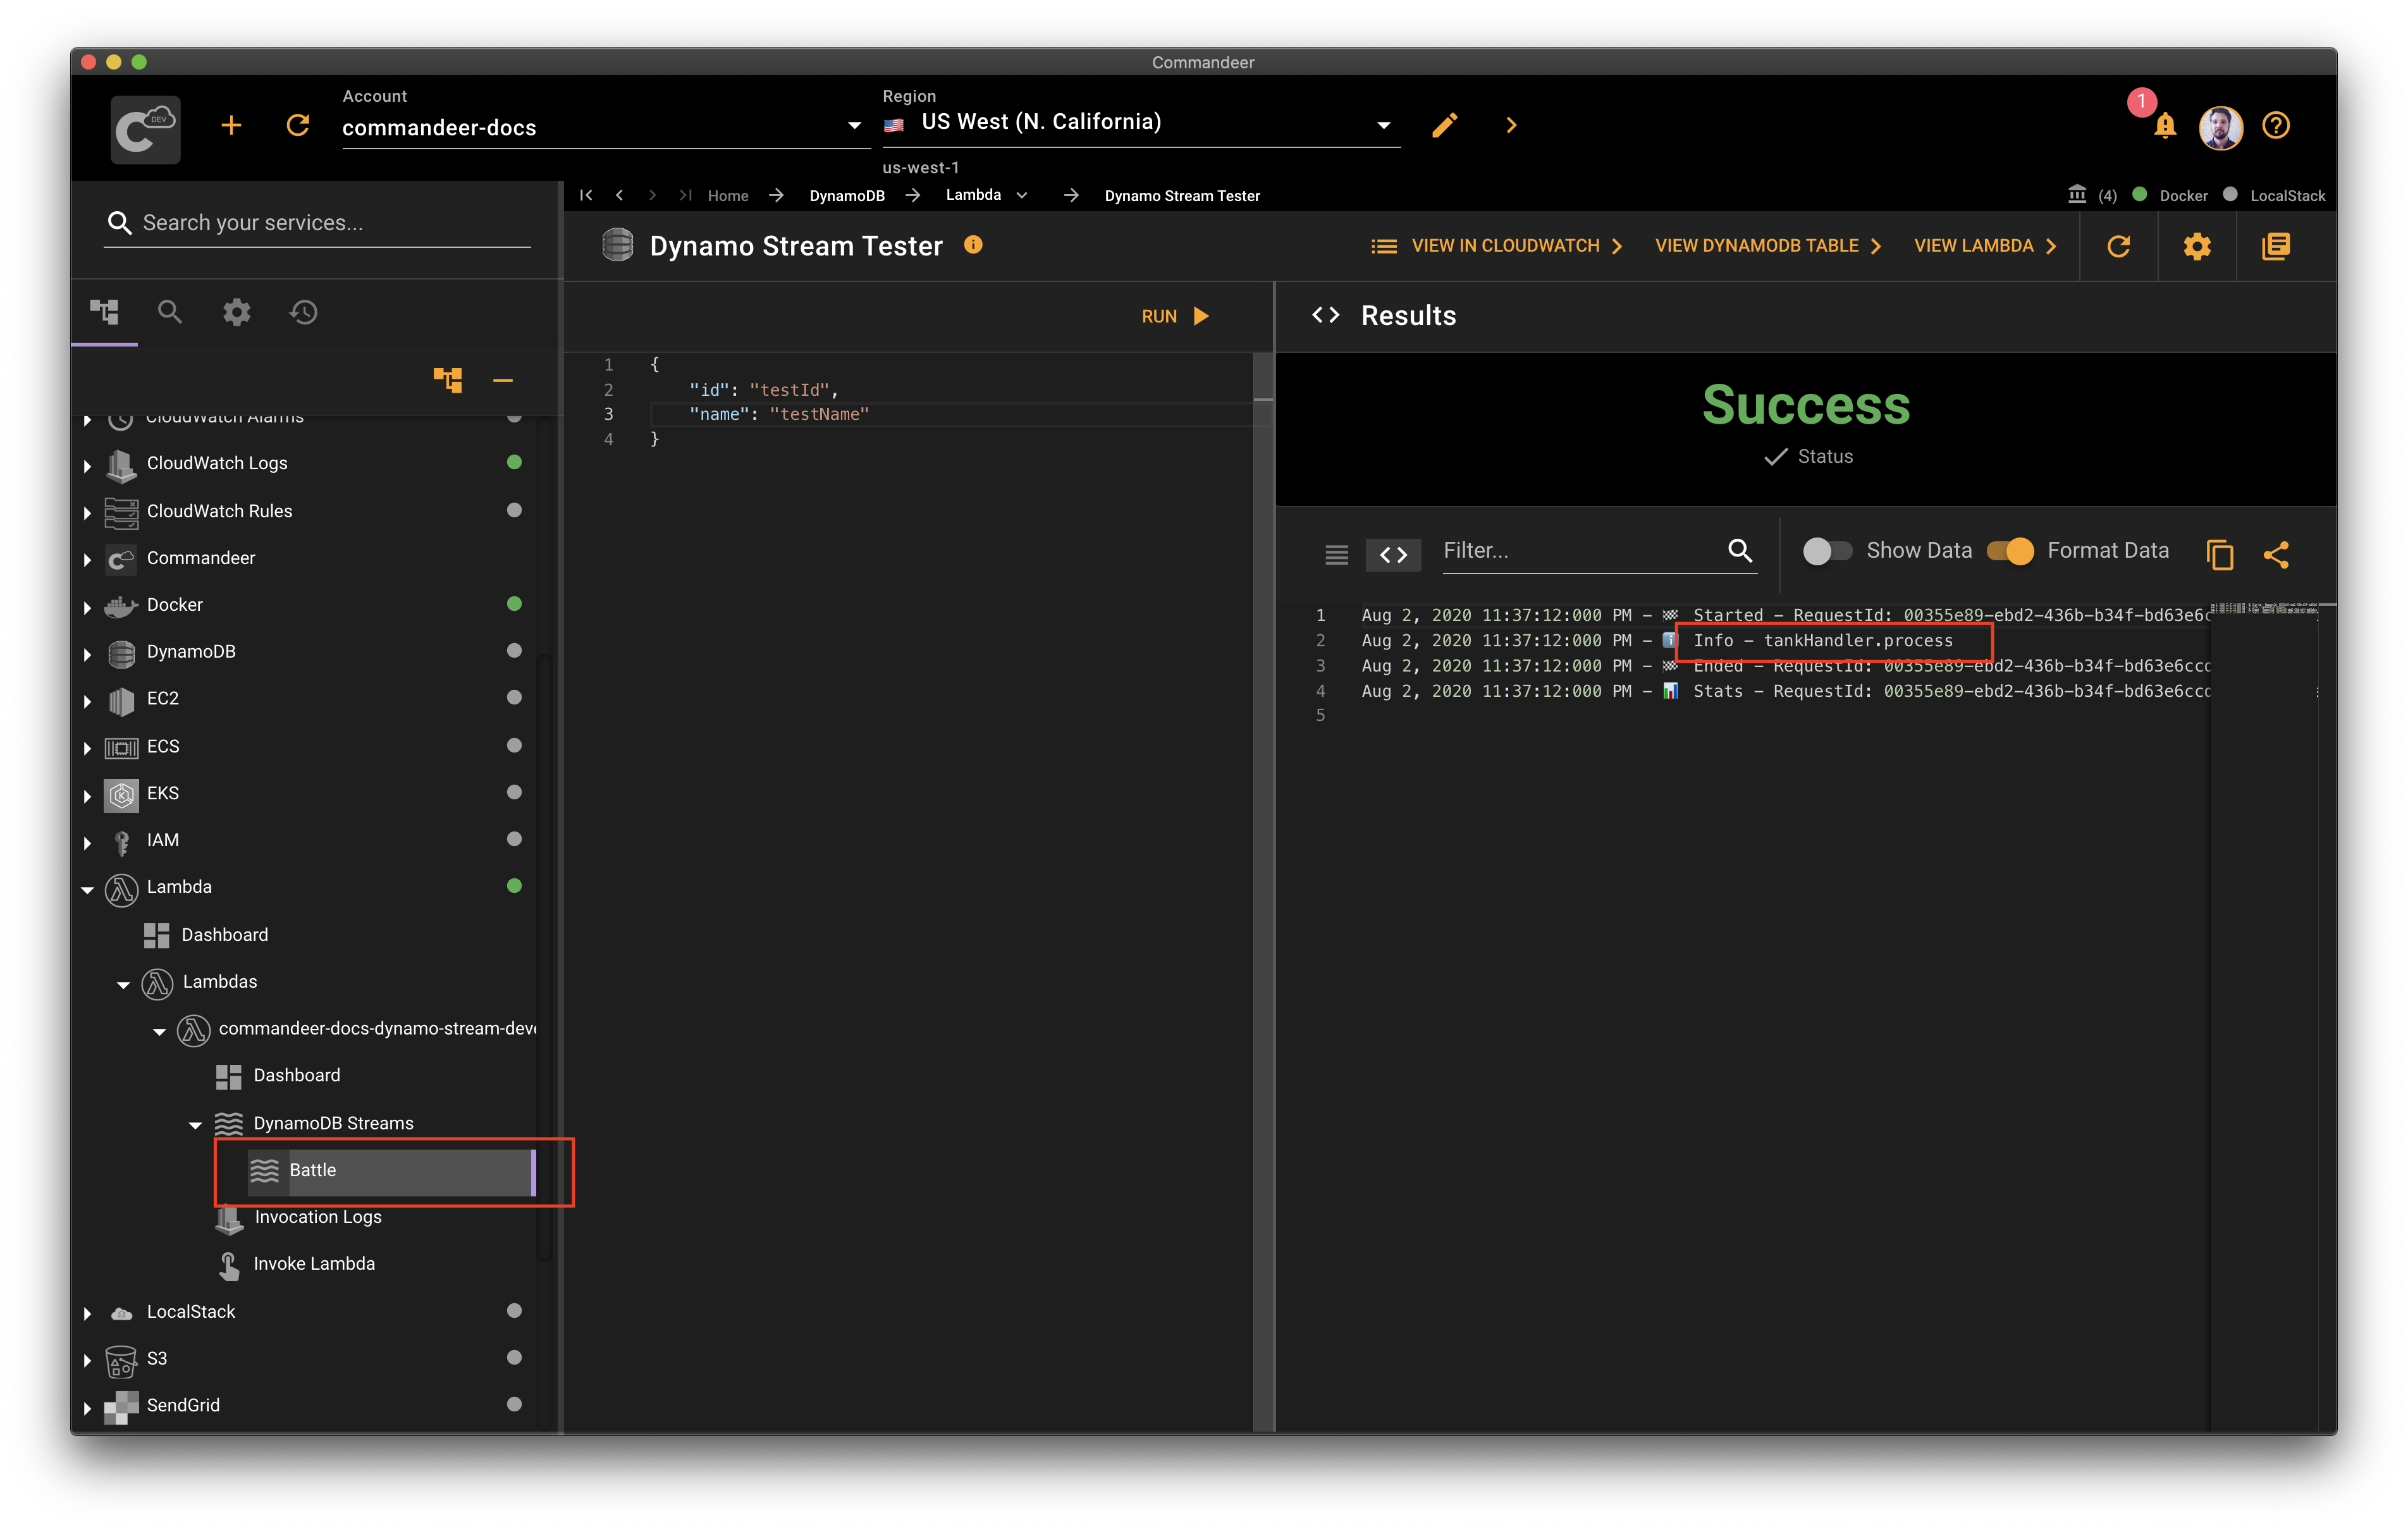
Now let's test our connection between our Battle DynamoDB table and the tankHandler lambda. Select your Battle DynamoDB stream from the side navigation -> Lambda -> tankHandler -> DynamoDB Streams. Enter some test JSON payload on the left. In our case, the only mandatory parameter is the id. Then hit Run. Commandeer will create a record in the DynamoDB table and will look for the Lambda logs. Once the logs are found, you'll see the log from our lambda saying tankHandler.process from the step earlier.
# Conclusion
We deployed our DynamoDB table with Ansible, connected our Lambda to a DynamoDB stream using Serverless. And we tested our infrastructure end to end with Commandeer. It all comes down to using the right tool for the job. It's important to know about each tool and how to use it properly. Join our newsletter to stay updated about cloud development and check out Commandeer for your next cloud project. Have fun!
